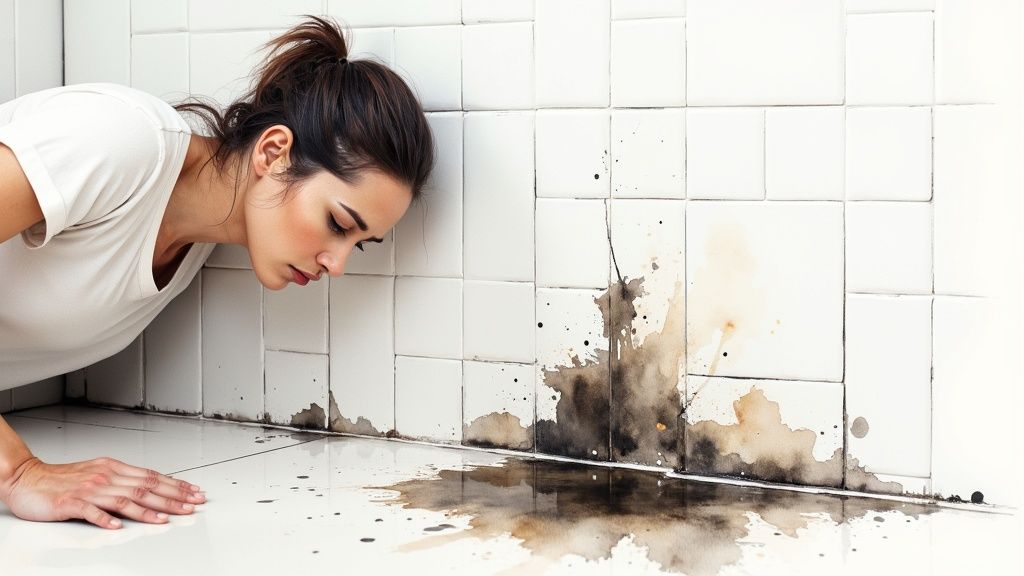
Finding a patch of mould is a real gut punch, isn't it? Whether it’s hiding behind furniture or creeping up a bathroom wall, that dark stain can instantly make your home feel less like a sanctuary and more like a problem you just don't have time for. Before you reach for the harshest chemicals on the shelf, you should know that a powerful natural mould killer is often safer and way more effective for getting the job done right.
Why Going Natural Is Your Best Bet Against Mould
When you see that ugly patch of mould, your first thought is probably to obliterate it. With the strongest cleaner you can find. I get it. But harsh chemicals are a bit like using a sledgehammer to crack a nut… they often cause more problems than they solve.
Many store-bought cleaners can fill your home with potent fumes that aren't great for you, your family, or your pets to breathe in. It feels like you’re just swapping one problem for another. You know?
The Problem Isn't Just the Stain
It’s easy to think of mould as just an ugly blemish. But it’s so much more than that. When you disturb mould, it releases microscopic spores into the air. Breathing these in can be a real issue, especially for anyone with allergies or asthma. You can learn more about the hidden dangers of mould and why it's so important to tackle it properly.
What's really surprising is just how common this is right here in Australia.
Research shows that a staggering 70% of Australian homes have some level of mould, and about 28% of people are genetically more susceptible to health issues from it.
This is exactly why choosing a natural mould killer is such a smart move. Natural solutions, like the ones we'll get into, work to kill the mould at its root without introducing a cocktail of chemicals into your living space. They're tough on mould, but gentle on your home.
What to Expect From This Guide
Over the next few sections, we're going to dive deep into everything you need to know. We’ll build your natural mould-fighting toolkit, walk through the step-by-step removal process, and cover the essential safety precautions. Think of this as your complete roadmap to a healthier, mould-free home. Starting now.
Building Your Natural Mould Fighting Kit
Alright, let's get you kitted out. You won’t need a shopping trolley full of complicated chemicals with scary-looking labels. We're going back to basics with a few powerhouse ingredients that genuinely get the job done.
It's not just about knowing what to use, but understanding why it works. It's like cooking… knowing your ingredients makes you a much better chef. The same idea applies here when you're tackling mould.
This quick visual guide shows you the simple essentials for your natural mould-fighting arsenal.
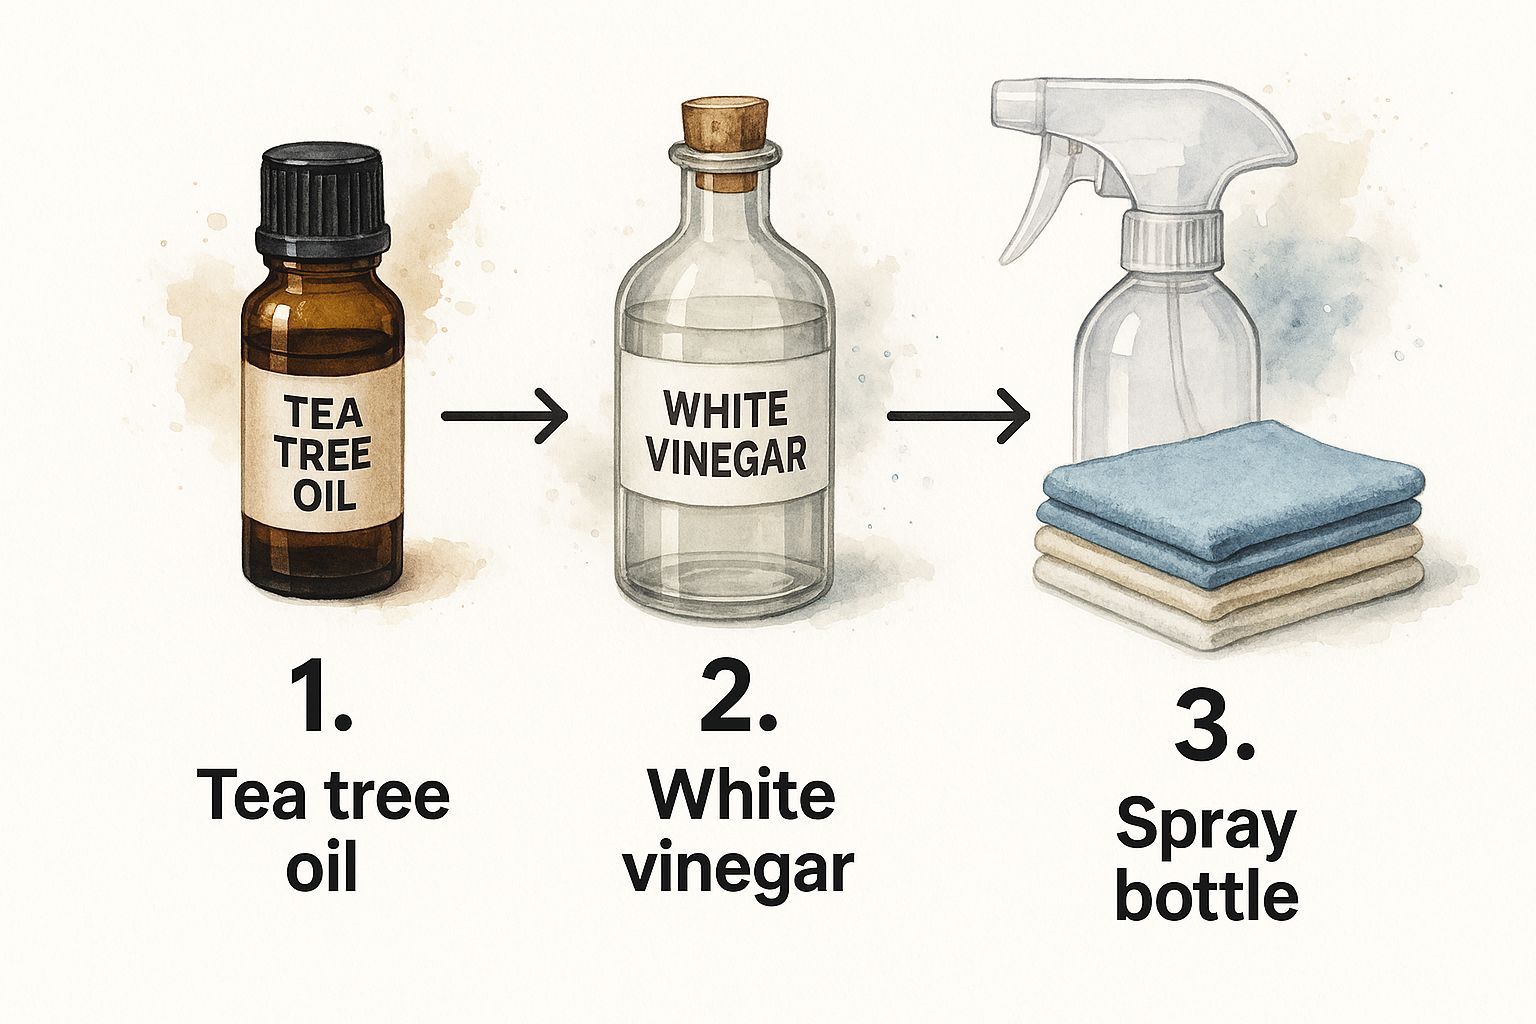
As you can see, it's about combining a potent natural mould killer with the right tools for application and, most importantly, safe removal.
Your Go-To Ingredients
First up is your main weapon. We have a couple of fantastic, reliable options here that I've used time and again.
-
Plain White Vinegar: This is your number one player. The acetic acid in vinegar is brilliant at killing mould right down to its roots, especially on porous surfaces like grout or wood. It gets in deep where bleach just can't.
-
Pure Tea Tree Oil: This stuff is a true natural wonder. It has powerful antifungal properties that people have recognised for ages. Just a small amount mixed with water creates an effective spray that also leaves a fresh, clean scent behind.
You don't need both, but it's good to know your options. Vinegar is incredibly cost-effective and easy to find, while tea tree oil is a great alternative if you can't stand the vinegar smell.
For most situations, a good quality white vinegar is all you need to get started. It's cheap, effective, and you probably already have some in your pantry.
The Essential Tools
Now for the supporting cast. Having the right tools makes the entire process so much easier and more effective. It's the difference between a frustrating chore and a job well done.
-
A Good Quality Spray Bottle: Don't skimp on this. A sturdy, reliable spray bottle will help you apply your solution evenly and get into all those tricky corners without dripping everywhere. Glass bottles are a great choice as they won't degrade over time, especially with acidic solutions like vinegar.
-
Microfibre Cloths: You’ll want a few of these on hand. They're excellent for the final wipe-down because they trap tiny mould particles instead of just smearing them around like an old rag would.
-
A Scrub Brush: For stubborn, set-in mould, particularly in grout lines or on textured surfaces, a brush with firm bristles is non-negotiable. It gives you the extra muscle needed to dislodge the really tough stuff.
Remember, the goal is to create a simple yet powerful kit. You're not building a science lab… you're just assembling a few trusted items that will help you reclaim your space from mould, safely and effectively. It’s about being prepared, not overwhelmed.
With these few items gathered, you're not just ready to clean the mould you see. You're equipped to handle the problem at its source, setting yourself up for a healthier home environment. It feels good to be prepared, doesn't it?
The Complete Process for Removing Mould Naturally
Alright, this is where we roll up our sleeves. You've got your gear ready, and now it's time to actually tackle that mould. I'm going to walk you through the whole thing. From the first spray to the final wipe-down. So you know exactly what to do.
Think of this as me right there with you, guiding you step-by-step.
Mixing Your Natural Solution
First things first, let's get your natural mould killer mixed and ready to go. The ratios are important here because we want the solution to be potent enough to kill the mould at its source without being wasteful. Simplicity is your best friend.
For a vinegar spray, it’s as easy as it gets.
- Pour undiluted white vinegar (with about 5% acidity) straight into your spray bottle. No need to add water. The goal is to let that acetic acid work at full strength.
If you're using tea tree oil, the approach is a little different.
- Add about 2 teaspoons of pure tea tree oil to 2 cups of water in your spray bottle. Give it a really good shake before each use, as oil and water naturally separate.
And that's it. You've now got a powerful, non-toxic weapon ready for action.
Applying Your Mould Killer Correctly
Now for the main event. How you apply your natural mould killer really matters. This isn't about a quick spray and a frantic scrub… we need to give the solution time to do its job properly.
Start by spraying your chosen solution directly onto the mouldy area. Don't be shy with it. You want to completely saturate the surface, making sure every last bit of the patch is covered.
Now for the most important part… walk away.
Seriously. Let it sit for at least an hour. This is where the magic happens. The vinegar or tea tree oil needs time to penetrate porous surfaces like grout or plasterboard and kill the mould at its roots. Scrubbing right away is tempting, but it’s less effective and just stirs up spores into the air.
Let your natural solution do the heavy lifting for you. Patience is the secret ingredient here; giving it at least 60 minutes to soak in allows it to break down the mould's structure from the inside out, making the final clean-up much easier.
The Scrub and Wipe-Down
After you’ve let the solution work its magic for an hour (or even longer for stubborn patches), it's time to get physical.
Grab your scrub brush and get to work on the area. Use firm, circular motions to dislodge all the dead mould from the surface. You'll notice it comes away much more easily now than if you had tried to scrub it dry.
For tricky bathroom areas, our detailed guide on removing mould from the bathroom has some extra tips for grout lines and tiles.
Once you’ve scrubbed the area clean, it's time for the final step. Take a clean, damp microfibre cloth and wipe away all the residue. Keep rinsing the cloth in clean water to stop yourself from just spreading the mess around.
Finally, give the area one last light misting with your spray and just let it air dry. This leaves a fine layer of your natural mould killer behind, which helps to prevent any lingering spores from starting a new colony. It's a simple finishing touch that makes a real difference.
How to Stay Safe During Mould Removal
It's easy to think that because we're using a natural mould killer like vinegar, we can get a bit casual with safety gear. I've heard it before. "It's just vinegar, what's the harm?" But that way of thinking misses the real danger.
The problem isn't the cleaning solution you're using. The real issue is the mould itself. The second you spray or scrub a patch of mould, it panics and releases a cloud of microscopic spores into the air. And trust me, you do not want to be breathing those in.
This isn't about being over the top. It’s about being smart so you can get the job done right the first time, without making yourself sick in the process.
Your Non-Negotiable Safety Kit
Think of this as your uniform for the job. It’s simple stuff, but every piece plays a vital role in protecting you from those invisible spores you’re about to kick up.
-
A P2 Mask: This is your most important piece of kit. Hands down. A simple cloth mask or surgical mask just won't cut it. You need a proper P2 rated mask (the Australian equivalent of an N95) designed to filter out those tiny mould particles. No exceptions.
-
Gloves: A good pair of rubber or disposable gloves is a must. They keep the mould off your skin and stop any potential irritation. Simple as that.
-
Eye Protection: Goggles or safety glasses are a brilliant idea, especially if you're spraying a solution upwards onto a ceiling or high on a wall. The last thing you want is splashback in your eyes.
Putting this gear on should be the very first thing you do. Even before you start mixing your cleaning solution.
It takes less than 60 seconds to put on a mask and gloves. That one simple action creates a crucial barrier between your lungs and the thousands of mould spores you're about to disturb. It's a tiny step with a massive impact on your health.
Let Fresh Air Be Your Best Friend
Ventilation is an absolute game-changer. And it costs nothing. Before you even think about spraying, open every window and door in the room you’re working in. If you've got an exhaust fan in the bathroom or kitchen, flick it on.
Your goal is to create as much airflow as possible. This helps to whisk the disturbed spores straight outside, instead of letting them settle somewhere else in your house to start a new colony. It's such a basic step, but it makes a huge difference to the air quality while you work. Don't skip it.
Winning the War by Preventing Mould's Return
Getting rid of the mould you can see is a great feeling. But the real victory… the thing that actually lets you relax… is making sure it never gets the chance to come back. This is where we shift from being reactive to being proactive.
The truth is, mould is a bit like a very unwelcome house guest. It doesn't just show up for no reason; it needs a specific invitation. That invitation is almost always moisture combined with a lack of fresh air. So, our job is to make our homes as unwelcoming as possible for it.
Starve It of What It Needs
Mould can't grow without water. It’s the single most important ingredient for its survival. By controlling moisture, you're cutting off its life support.
This doesn't mean you need to live in a desert. It just means being mindful of the everyday things that create dampness, especially in those well-known trouble spots.
-
After a Shower: Don't just shut the bathroom door and leave. Run the exhaust fan for a good 10-15 minutes afterwards to pull all that steam out. If you don't have a fan, just opening a window wide makes a huge difference. For more detailed advice, check out our complete guide on how to prevent mould in the bathroom.
-
In the Kitchen: When you're cooking up a storm, always use the rangehood fan. All that steam from boiling pasta or simmering a soup has to go somewhere, and it's much better if it goes outside instead of settling on your walls and ceiling.
These aren't expensive renovations. They are tiny, consistent habits that slowly turn your home into a fortress against mould.
Let Your Home Breathe
The second part of the puzzle is airflow. Stagnant, still air is mould’s best friend because it allows moisture to settle and build up on surfaces. You need to keep the air moving.
Think about your wardrobes. Don't pack them so tightly that air can't circulate. Leaving a small gap between clothes and the back wall can be enough to stop that musty smell from developing. On a sunny, dry day… just open up all the windows for an hour. It’s like hitting a reset button for your home’s air.
It's encouraging to see a wider shift happening in Australia, with the cleaning industry now leaning more towards these kinds of mindful, health-conscious solutions instead of just reaching for harsh chemicals. You can read some interesting insights about the industry's shift towards natural products as mould awareness increases.
The long-term game isn’t about endlessly cleaning mould. It's about creating an environment where mould simply can't get a foothold in the first place. Every open window and every flick of an exhaust fan is a small victory.
Knowing When to Call for Help
Sometimes, despite your best efforts, a mould problem can be bigger than a DIY job. If you find a patch of mould that’s larger than your hand, or if it keeps coming back no matter what you do, it’s a sign of a deeper issue. A persistent musty smell with no visible source is another major red flag.
This is the point where it’s time to call in a professional. They have the right gear to find the hidden source of the moisture and handle large-scale removal safely. There’s no shame in it… it’s about protecting your home and your health.
Your Questions About Natural Mould Removal, Answered
When you're tackling mould for the first time, it's easy to feel a bit overwhelmed. You've probably got a dozen questions running through your mind, and that's completely normal. Let's clear up some of the most common ones I hear from clients so you can move forward with confidence.
Here are some straight, simple answers to get you on the right track.
Is Vinegar Really Better Than Bleach for Killing Mould?
Yes. One hundred percent. If you take one thing away from this guide, let it be this.
Bleach is great at whitening stains, which makes it look like it’s solved the problem. But on porous surfaces like grout, timber, or drywall, it often just kills the surface mould, leaving the roots behind. It’s like mowing a weed… it looks better for a day or two, but it’s guaranteed to grow back.
Vinegar, with its natural acidity, actually penetrates these surfaces and kills the mould right down at the source. Plus, you’re not filling your home with harsh chemical fumes, which is a massive win for your indoor air quality.
How Long Does a Natural Mould Killer Need to Work?
This is where a bit of patience pays off. With a spray-and-leave solution like vinegar or tea tree oil, you need to give it time to do its job. I always recommend letting it sit for at least an hour.
This gives the solution enough time to soak in and properly break down the mould's structure. If you’re dealing with a really stubborn patch, don't be afraid to reapply it or even leave it overnight before you come back to give it a final scrub.
Can I Mix Different Natural Ingredients Together?
It's tempting to think that mixing ingredients will create some kind of super-powered mould killer, but it's usually best to keep it simple. Sticking to one main active ingredient at a time gives you the most reliable results.
For instance, mixing vinegar and bicarb soda creates that satisfying fizzy reaction that's great for scrubbing. But chemically, the two ingredients quickly neutralise each other, basically turning into saltwater and losing their mould-killing properties.
One mix you must always avoid is vinegar and hydrogen peroxide. Combining them can create a corrosive acid that you definitely don't want to be spraying around your home. For safety and effectiveness, stick to one recipe at a time.
When Should I Stop and Call a Professional?
DIY methods are fantastic for small, manageable spots, but there are clear signs when it’s time to call in the experts.
If you find a mould patch larger than the palm of your hand, it often points to a bigger, underlying issue. The same goes if the mould keeps returning no matter what you try, or if there's a persistent musty smell you just can't locate.
These are all red flags that the problem might be inside your walls or under your floors. Professionals have specialised gear to find the hidden moisture source and are equipped to handle large-scale infestations safely, without spreading spores through your home.
When the mould problem feels too big to handle on your own, That Cleaning Crew provides professional mould remediation services to safely and effectively restore your space. Find out how we can help with a free on-site quote.