Spotted a few small patches of mould on your bathroom ceiling? Look, you can often handle these yourself with the right gear and a bit of elbow grease. Seriously. But if you’re staring at an area larger than a square metre, or if the mould keeps coming back no matter what you do… that's a clear sign you need to call in the professionals. Professional remediation is the only way to be sure you've dealt with the underlying moisture problem for good.
Why Your Bathroom Ceiling Is a Perfect Home for Mould

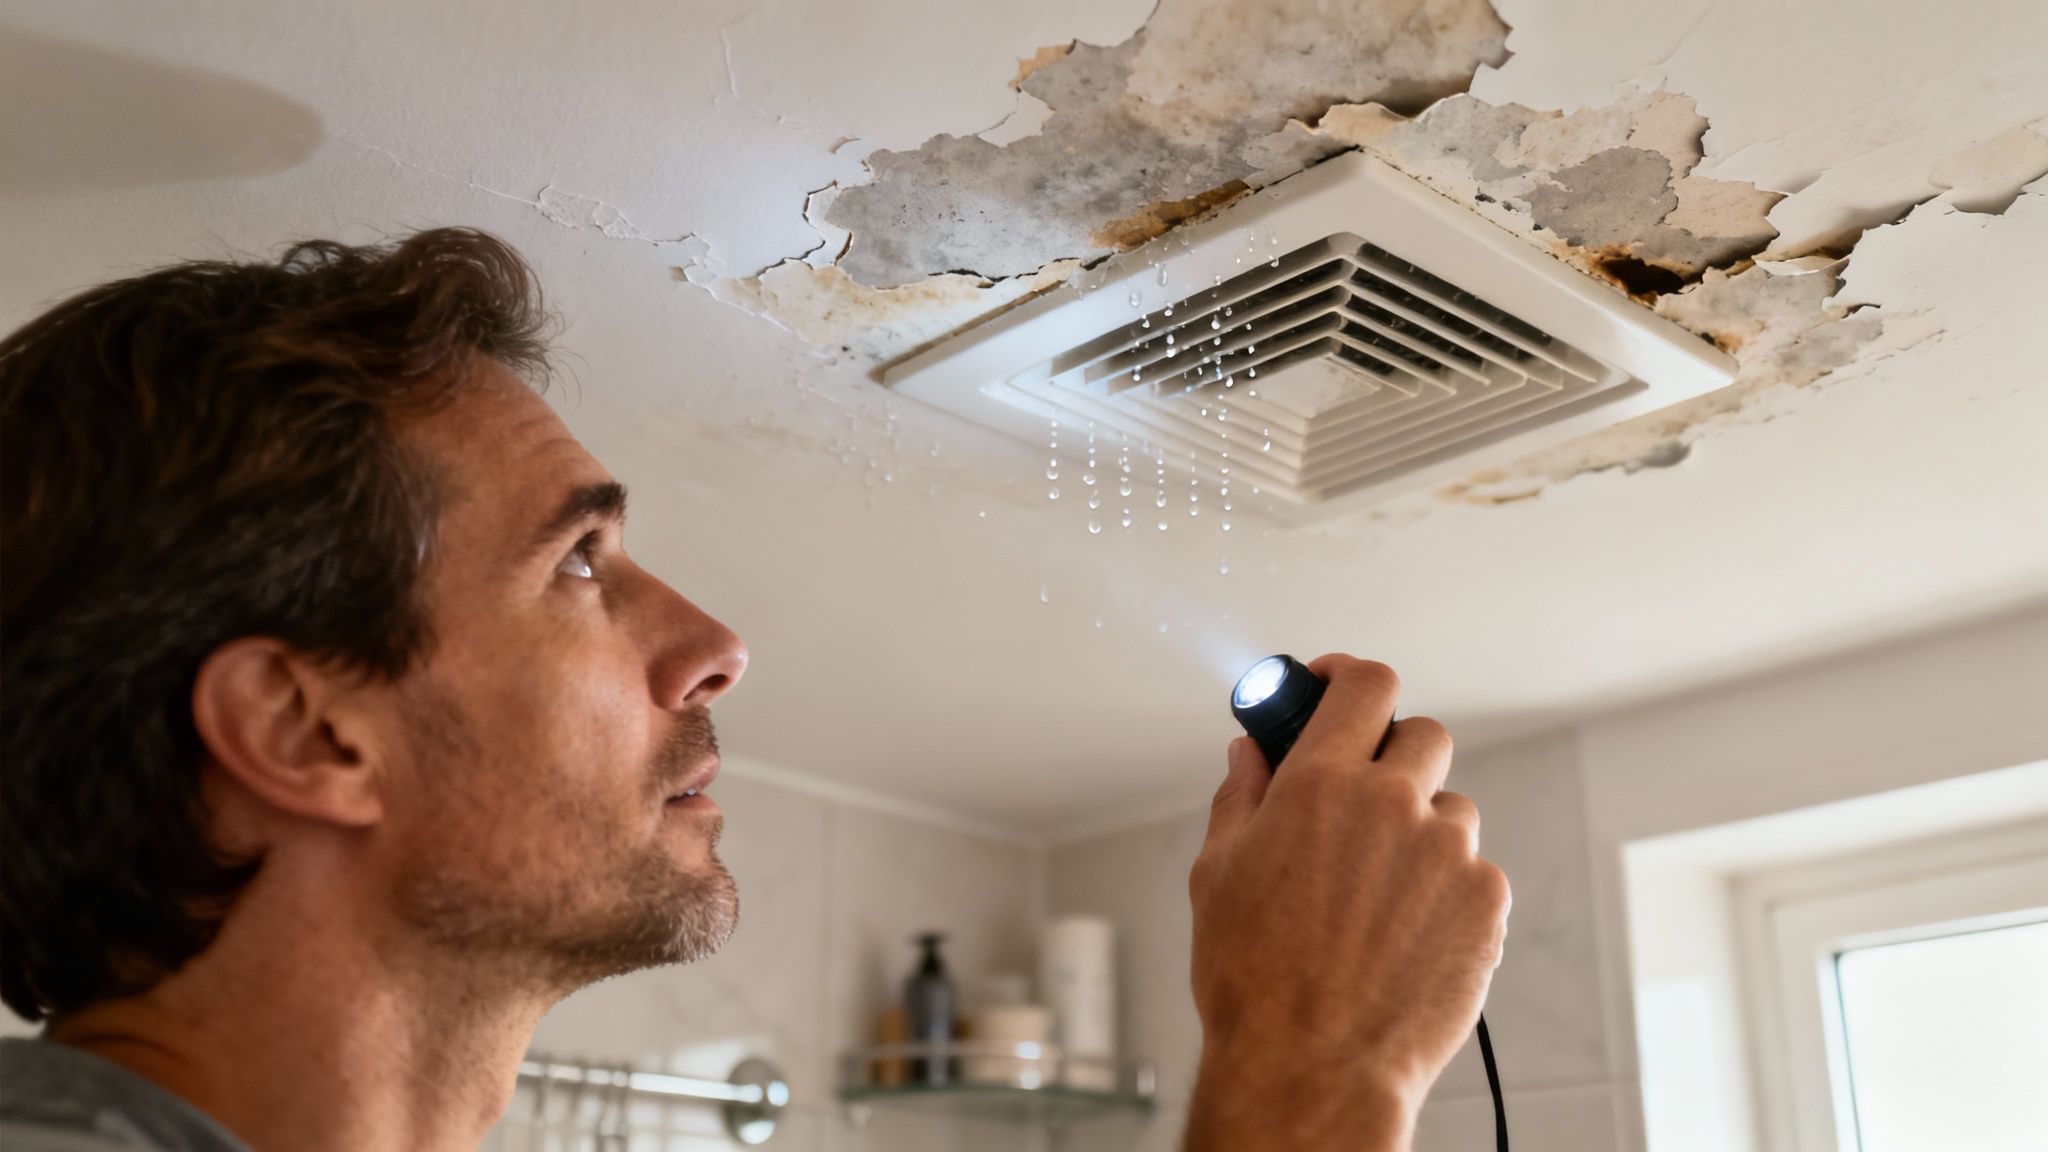
You look up mid-shower and there it is. Those ugly dark spots spreading across the paint. It’s a frustrating moment, and a frustratingly common one. But why does mould seem to love your bathroom ceiling so much? It’s definitely not just bad luck.
Think of your bathroom as a perfect little ecosystem for mould. It's got everything mould spores need to not just survive, but to thrive: warmth, moisture, and a food source (like your paint or plasterboard).
Every single hot shower you take pumps the room full of steam. This warm, humid air naturally rises and collides with the cooler ceiling, where it condenses back into water droplets. And just like that… you've created the damp surface conditions that mould needs to set up camp.
This isn’t just a problem in your home, either. Mould in residential properties is a huge concern across Australia, affecting anywhere between 10% to 50% of homes. One study even found that private renters reported mould issues far more frequently (55.2% of cases) compared to owner-occupied homes (just 8.4%), which really shows how much housing conditions can play a role.
Key Factors That Encourage Mould Growth
So, what are the specific ingredients that turn a standard bathroom into a mould hotspot? It almost always boils down to a combination of a few key culprits. Once you know what they are, you’re in a much better position to fight back.
- Persistent Humidity: That steam from daily showers and baths is the number one offender. If that moisture has nowhere to go, it just lingers, keeping surfaces damp for hours on end.
- Poor Airflow: A lack of decent ventilation is what traps all that humid air inside. An old, underpowered exhaust fan or a window that’s always shut creates a stagnant, stale environment where mould can flourish completely undisturbed.
- Hidden Water Leaks: Sometimes, the problem has nothing to do with shower steam. A slow, sneaky leak from a pipe in the ceiling cavity or an issue with the roof above can provide a constant source of moisture you might not even be aware of.
Understanding the 'why' is the most important step. Just cleaning the spots away without fixing the source is like bailing water out of a boat with a hole in it. You have to find and plug the leak first.
Getting a handle on ventilation is critical. Improving your setup can make a massive difference, and it's worth taking the time for understanding various bathroom ventilation options. After all, knowing your enemy is the key to winning the battle against ceiling mould for good.
Diagnosing the Root Cause of Your Mould Problem
Before you even think about reaching for the cleaning supplies, let's play detective for a minute. Just scrubbing the visible mould in your bathroom ceiling is like pulling the tops off weeds. Sure, it looks better for a little while. But if you don't get the root, you know it’s coming right back.
The real culprit behind every single mould problem is moisture. Always. Those dark patches are just the symptom of a bigger issue. So, our first job is to figure out exactly where that moisture is coming from.
Looking Beyond the Obvious Culprits
The most obvious suspect is the steam from your shower. That warm, damp air rises, hits the cooler surface of your ceiling, and condenses back into water droplets. It’s the perfect recipe for mould.
But it’s a mistake to stop there. Sometimes, the source is much sneakier, and if you only treat the condensation, you’ll be doing this all over again in a few months. Frustrating, right? We need to investigate a little deeper to find the real story.
Here's a quick look at the main reasons you might be seeing mould and what they really mean for your bathroom.
Common Causes of Bathroom Ceiling Mould
| The Culprit | What's Really Happening | First Thing to Check |
|---|---|---|
| Poor Ventilation | Steam and humid air have nowhere to go, so they settle on the ceiling. | Is your exhaust fan working? When was it last cleaned? |
| Hidden Pipe Leak | A slow-leaking pipe in the ceiling cavity is providing a constant water supply. | Look for discolouration, bubbling paint, or drips. |
| Roof or Gutter Issues | Rainwater is seeping into the ceiling from a blocked gutter or a cracked tile. | Check your roofline and gutters, especially after heavy rain. |
| Failed Waterproofing | The membrane in your shower has failed, letting water seep into walls and ceilings. | Are there loose tiles or cracked grout in the shower? |
Digging into these possibilities helps you move from just reacting to the problem to actually solving it for good.
The goal isn’t just to clean the mould; it’s to make your bathroom a place where mould can't grow in the first place. Finding the true moisture source is 90% of the battle.
If you're unsure what you're dealing with or suspect the problem is widespread, it might be time to get a professional opinion. For a detailed breakdown, the ultimate guide to mold testing can help you decide if it's time for a deeper look.
The Tell-Tale Signs of a Moisture Problem
Visible mould is just one clue. Your bathroom might be giving you other signals that point directly to the root cause. Keep an eye out for these.
- Peeling or Bubbling Paint: This is a huge red flag. Paint peels when moisture gets behind it, breaking the bond with the plasterboard. It's a clear sign the surface is getting damp from either condensation or a leak.
- A Persistent Musty Smell: You know that damp, earthy smell? That’s the smell of active mould growth. If the odour lingers long after the bathroom has aired out, it suggests a constant moisture source is feeding a colony you might not even be able to see.
- Damp to the Touch: On a dry day, run your hand over the ceiling and the top of the walls. If they feel cool or slightly damp, you likely have a condensation problem that your ventilation isn't handling.
By paying attention to these details, you can shift from just cleaning the spots to proactively solving the moisture issue that's causing them. This is the only way to say goodbye to that recurring mould for good.
Your Game Plan for Getting Rid of Ceiling Mould
Alright, you've played detective and have a good idea of what's causing the mould. Now it’s time to actually get rid of it. But we're going to tackle this the right way… safely and effectively, so you're not just making the problem worse.
This isn't just about making things look pretty again. It's a health issue. Recent Australian surveys estimate that up to half of all homes have some level of indoor mould contamination, often driven by the exact dampness and poor ventilation we see in bathrooms. This exposure is linked to real health problems, particularly respiratory issues like asthma and allergies. You can learn more about the health risks of indoor mould from detailed government assessments.
So, let's get this done properly.
Gearing Up for the Job
Before you even think about touching the ceiling, you need to get your safety gear sorted. This part is absolutely non-negotiable. Disturbing mould releases its spores into the air, and you don't want to be breathing that stuff in.
Think of it like getting ready to do a messy paint job. You wouldn't just start splashing paint around, right? Same idea here.
Here’s your essential checklist:
- A P2 Mask: This is your most important piece of equipment. A simple dust mask won't cut it. You need a P2-rated respirator to filter out the tiny mould spores.
- Safety Goggles: You want ones that wrap around your eyes to prevent any cleaning solution… or mould… from splashing into them.
- Rubber Gloves: A good sturdy pair will protect your hands from both the cleaning solution and direct contact with the mould.
- Old Clothes: Wear something you don’t mind getting dirty or potentially stained.
Once you're kitted out, protect the rest of your bathroom. Lay down some plastic drop sheets over your vanity, toilet, and floor. This makes clean-up so much easier and stops spores from settling on other surfaces.
Choosing Your Cleaning Solution
Now for the main event. You've probably heard all sorts of advice, from using straight bleach to fancy commercial products. The truth is, different situations call for different approaches.
Option 1: The White Vinegar Method
Don't underestimate this pantry staple. Plain white vinegar is a fantastic, non-toxic mould killer. Its acidity breaks down the structure of the mould, killing it right down to the root.
It’s a great first choice for smaller, surface-level mould patches on a painted ceiling.
Option 2: The Commercial Mould Killer
These products are specifically formulated to kill mould and often contain ingredients that help prevent its return. They can be very effective, especially on more stubborn or widespread mould.
Just be sure to read the label carefully and ensure the room is extremely well-ventilated… we're talking windows open and the exhaust fan running. The fumes can be pretty potent.
A quick personal tip… I always start with vinegar. It’s surprisingly effective and much gentler on your lungs and the environment. If that doesn't completely solve it after a couple of tries, then I’ll move on to a commercial product for a bit more power.
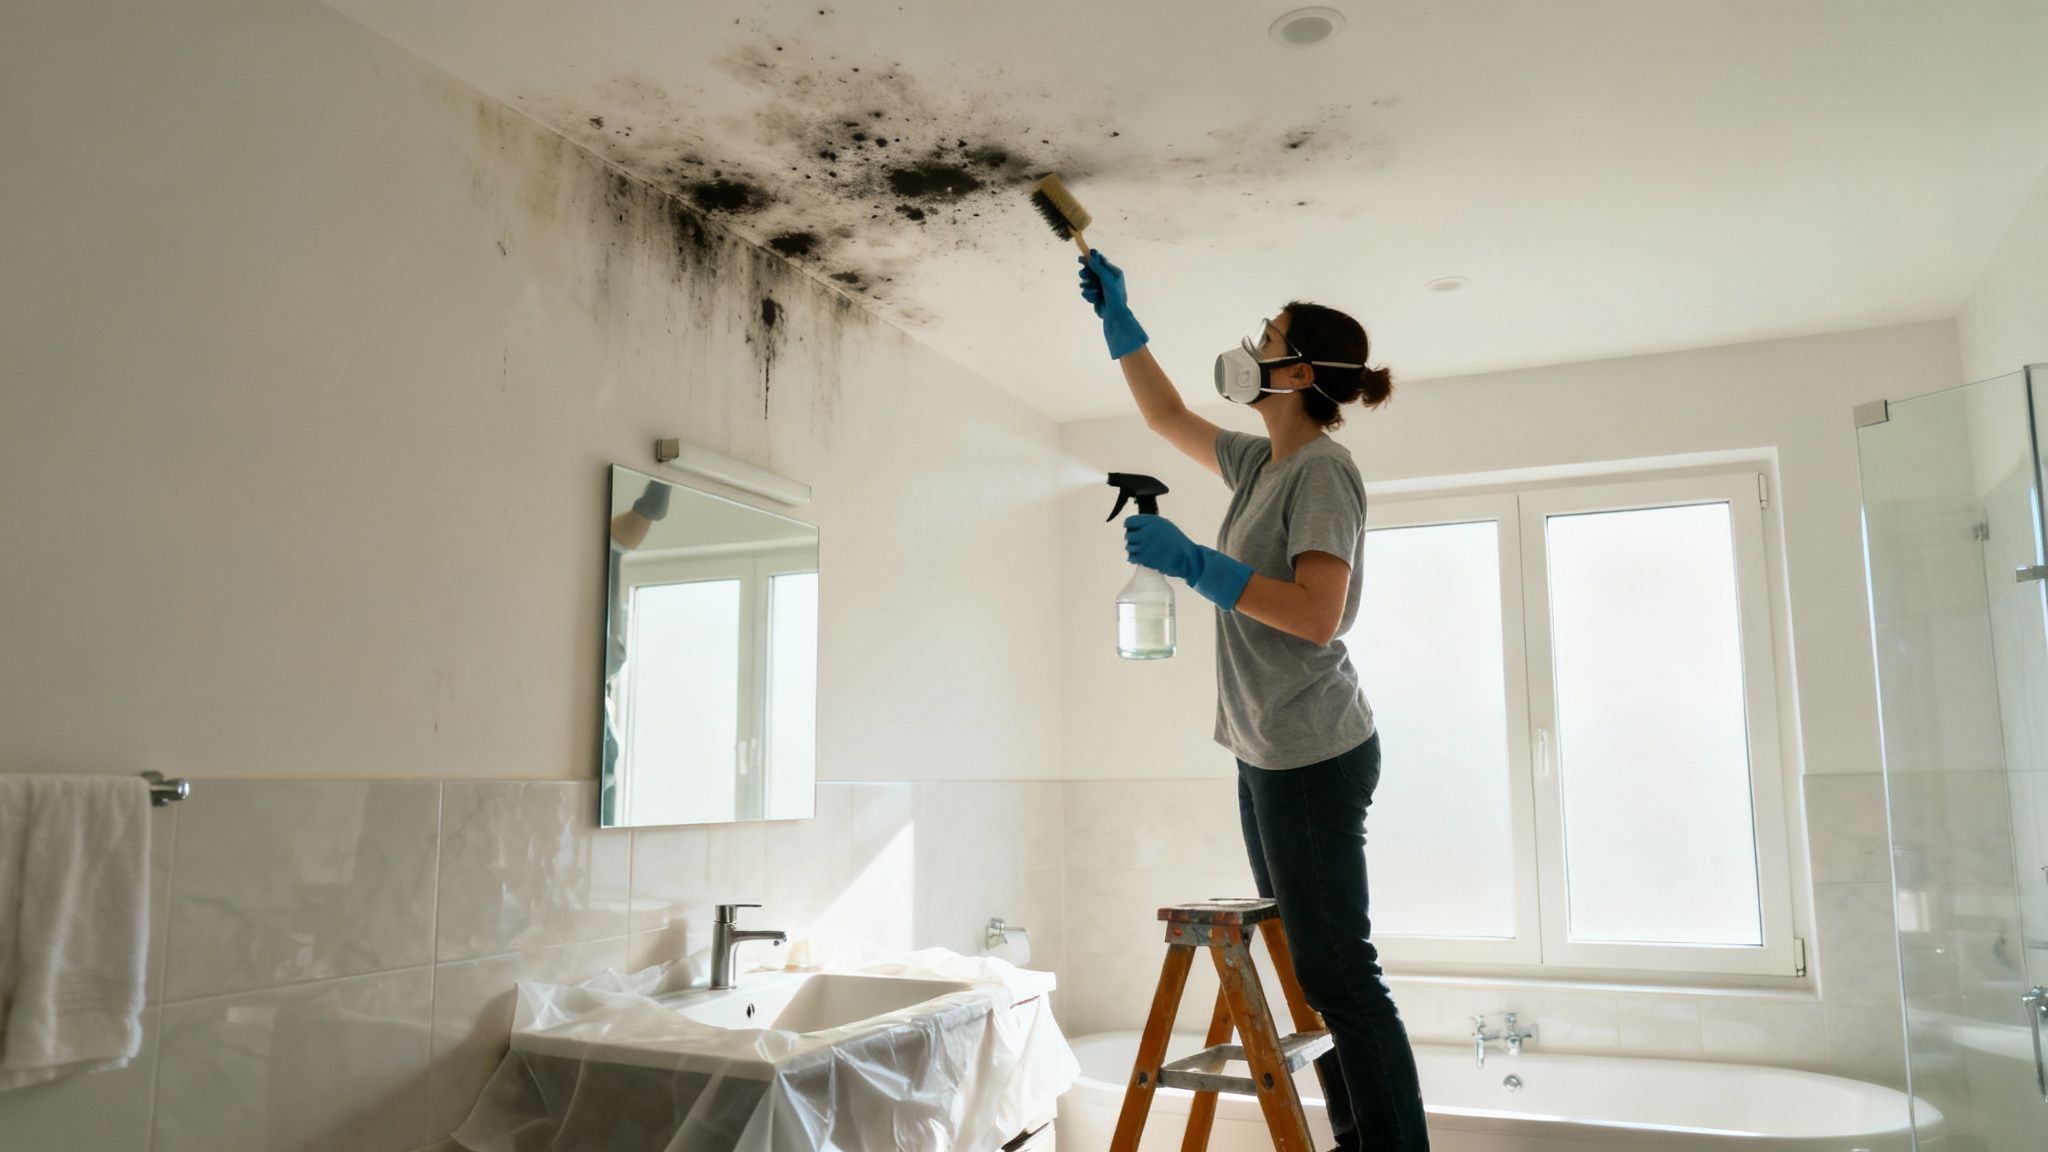
The Cleaning Process, Step by Step
Ready to go? Here's how to tackle that ceiling mould without spreading the spores everywhere.
First, put your chosen cleaner (undiluted white vinegar or the commercial product) into a spray bottle. Lightly spray the affected area. The key here is not to drench it. You want to dampen the mould, not send watery, spore-filled drips running down your walls.
Next, let it sit. This is the most important part, and the one people always rush. You need to give the solution time to work. Let the vinegar or mould killer sit on the surface for at least an hour. This gives it time to penetrate and kill the mould.
After an hour, take a damp microfibre cloth and gently wipe the mould away. Avoid aggressive scrubbing, as this can damage your paint and release more spores into the air. Use gentle, overlapping strokes in one direction.
Finally, dry the area thoroughly. Once the mould is gone, take a clean, dry cloth and wipe the area down completely. You can even point a small fan at the ceiling for an hour or so to make sure it's bone dry. Leaving any moisture behind is just inviting the mould to come straight back.
If you're dealing with a larger issue or want a more in-depth look at different techniques, our guide on removing mould from various bathroom surfaces provides some extra helpful tips. Following this careful process ensures you're not just cleaning what you can see, but truly dealing with the problem at its source.
How to Stop Mould from Ever Coming Back
Cleaning the mould off your ceiling is a great feeling. It’s satisfying. But let's be honest, that's only half the battle.
The real victory, the part that saves you from having to do this all over again in a few months, is making sure it never returns. This is where we shift from cleaning to preventing. The goal is simple: cut off its life support, which is always moisture.
Your Best Defence is Good Ventilation
Your number one tool in this fight is your exhaust fan. A good fan is like a bouncer for your bathroom, escorting all that steamy, humid air outside before it has a chance to settle and cause trouble.
But here’s the thing. A lot of fans are just making noise. They sound like they're working hard, but they aren't actually pulling much air at all. So, how can you tell if yours is doing its job or just pretending?
Here’s a simple trick I always recommend.
Grab a single square of toilet paper. Just one ply. Turn your exhaust fan on and hold the toilet paper up against the vent cover. If the fan has enough suction, it will grab that piece of paper and hold it there by itself. If the paper just flutters and falls… you’ve got a problem. Your fan is either too weak for the room's size, or it's so clogged with dust that it can't breathe.
This little test tells you everything you need to know. A fan that can’t hold a piece of toilet paper definitely isn't powerful enough to clear out a room full of thick shower steam.
This is a huge issue in Australian homes, especially in apartments across Sydney and Melbourne. For a bathroom to be properly ventilated, experts say the fan needs to replace the air in the room at least 15 times every hour. Many standard fans just don't have that kind of power, allowing dampness to linger and creating the perfect environment for mould.
Small Habits That Make a Big Difference
Beyond checking your fan, a few small changes to your daily routine can dramatically reduce the moisture hanging around. Think of these as the simple, everyday actions that keep your bathroom's defences strong.
- Run the Fan for Longer: Don't turn the fan off the second you step out of the shower. Leave it running for at least 15-20 minutes afterwards to give it time to pull all that lingering moisture out.
- Crack a Window: If you have a window, open it up a little during and after your shower. Combining this with the exhaust fan creates fantastic cross-flow that clears steam in no time.
- Wipe Down Surfaces: After a shower, grab a squeegee or an old towel and quickly wipe down the shower screen and wet walls. It takes less than a minute and removes a massive amount of water that would otherwise evaporate into the air.
These little things feel… well, little. But when you do them consistently, they add up to a much drier, less mould-friendly bathroom. For a deeper dive into creating a mould-hostile environment, check out our other guide on how to prevent mould in the bathroom.
Longer-Term Prevention Strategies
Once you've got your daily habits sorted, you can think about some more permanent upgrades to really future-proof your bathroom ceiling.
Consider a Mould-Resistant Paint
When it's time to repaint, choose a paint specifically designed for bathrooms. These paints contain special additives called mildewcides that actively inhibit mould growth. It’s like giving your ceiling a protective shield that mould just can't get a foothold on.
Check Your Silicone Seals
Take a close look at the silicone sealant around your shower, bath, and vanity. If it's cracked, peeling, or has black spots growing in it, it's not doing its job. Old silicone can let water seep into the wall cavities, creating a hidden moisture source. Ripping out the old stuff and applying a fresh, mould-resistant bead of silicone is a weekend job that can prevent a world of pain later.
Bring in a Dehumidifier
If you live in a really humid climate or have a bathroom with zero windows, a small dehumidifier can be a game-changer. It will actively pull moisture out of the air, keeping the humidity down to a level where mould simply can't survive.
When to Call a Professional Mould Expert
Sometimes, you’ve just got to know when to wave the white flag and call for backup. There’s absolutely no shame in it. In fact, knowing when a mould problem is bigger than a DIY job is one of the smartest things you can do for your home and your health.
Tackling a huge or complicated mould issue yourself can be risky. You could end up spreading the spores and making the situation much, much worse. It’s a bit like trying to fix a complex electrical problem with just a screwdriver and a bit of hope… you’re more likely to get a shock than solve the problem.
So, how do you know when it's time to put down the spray bottle and pick up the phone? There are a few very clear signs that the mould in your bathroom ceiling is sending out an SOS.
Reading the Warning Signs
Think of these as the giant red flags telling you it’s time for an expert. If you spot any of these, don't hesitate.
The most obvious one is size. If the mould patch is bigger than one square metre, that’s the general guideline to stop what you're doing and call a professional. An area that large strongly suggests a significant underlying moisture problem that needs more than just a surface clean.
Another huge clue is persistence. You scrubbed it all away. You were meticulous. But a few weeks later… it's back. This is the mould telling you that you haven't dealt with its life source. It’s a sure sign the moisture issue is ongoing, maybe from a slow leak inside the ceiling cavity.
You should also look at the material it’s growing on. If the mould has penetrated deep into porous materials like plasterboard or wood, a simple surface clean just won't get to the roots. When the drywall feels soft or is crumbling, the damage is becoming structural and needs a professional assessment, fast.
Don't ever just paint over it. It’s like putting a bandage on a broken arm. It hides the problem for a little while, but it doesn't fix anything. The mould will continue to grow underneath and eventually eat its way right through the new paint.
What Does a Mould Remediation Expert Actually Do?
Calling in a professional is about more than just a heavy-duty clean. They’re like mould detectives and surgeons rolled into one. They don't just treat the symptom; they find and fix the cause.
Here’s what you can generally expect:
- A Full Investigation: They’ll start by finding the source of the moisture using specialised equipment like moisture meters and thermal imaging cameras.
- Containment: This is critical. They will seal off the bathroom from the rest of your house using plastic sheeting to prevent any spores from escaping during the removal process.
- Air Filtration: They use high-efficiency particulate air (HEPA) filters to clean the air and capture any airborne spores that have been disturbed.
- Safe Removal: They will carefully remove all mould-damaged materials, like sections of plasterboard, and dispose of them safely according to industry standards.
- Thorough Cleaning: Finally, they clean all the remaining surfaces with antimicrobial treatments to kill any lingering spores and help prevent the mould from returning.
This infographic breaks down the basic principles of moisture control that are key to preventing mould from taking hold in the first place.
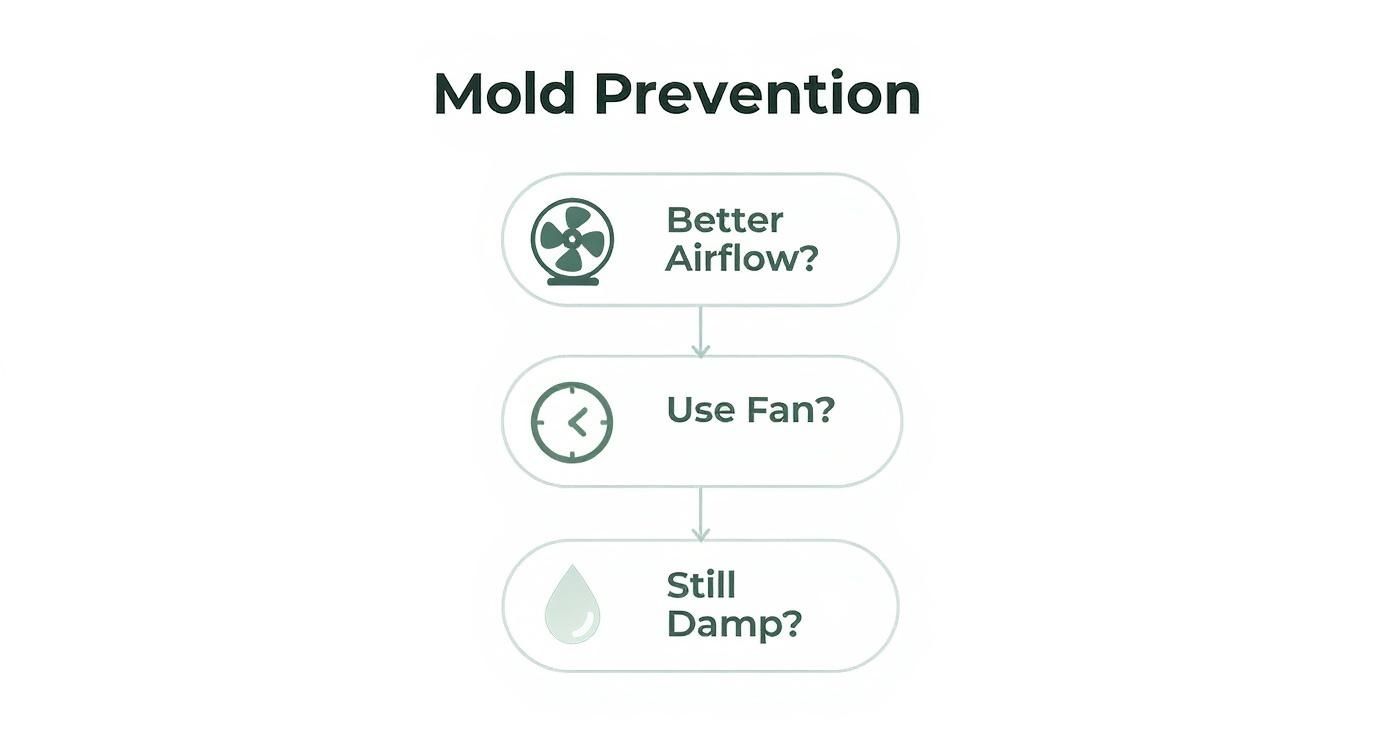
It shows that controlling airflow and managing dampness are the foundational steps to keeping your bathroom ceiling clear.
Making that call can feel like a big step, but it often saves a huge amount of stress, time, and money in the long run. If you're on the Central Coast and facing a persistent problem, getting advice from a specialised mould removal service can give you a clear path forward and peace of mind that the job will be done right.
Your Bathroom Mould Questions Answered
Still got a few questions buzzing around? You’re not alone. When you’re staring up at annoying dark spots on the ceiling, it’s natural to want a few things cleared up.
So, let's run through some of the most common things people ask when they find mould in their bathroom ceiling. I'll keep the answers quick and to the point.
Can I Just Paint Over the Mould on My Ceiling?
This is probably the number one question I get, and the answer is a hard no. I know it’s tempting. It feels like such a quick and easy fix to make the problem disappear.
But painting over mould is like putting a plaster on a deep wound. Sure, you’ve hidden the problem, but you haven't actually fixed it. The mould spores are still alive and well under that fresh coat of paint, happily feeding on the plasterboard and moisture.
Eventually, that mould will just chew its way right through the new paint, and you'll be back where you started… except now the problem is probably worse. Always, always, always clean and kill the mould completely before you even think about picking up a paintbrush.
Is the Black Mould in My Bathroom Dangerous?
The term 'black mould' gets thrown around a lot, and it definitely sounds scary. While it’s true that some specific types of black mould (like Stachybotrys chartarum) can produce mycotoxins, the reality is that any type of mould can cause health issues for the right person.
Think of it this way: you don’t need to know the specific species of spider to know you don’t want it in your house. The same goes for mould.
Regardless of its colour – black, green, or white – mould can trigger problems for people with asthma, allergies, or compromised immune systems. It's always best practice to treat all mould with caution and get rid of it safely.
Don't get too caught up on the colour. If you see mould, your focus should be on getting rid of it safely and, more importantly, fixing the moisture problem that's letting it grow in the first place.
How Can I Tell If My Exhaust Fan Is Powerful Enough?
This is a great question because a weak fan is one of the biggest culprits behind ceiling mould. It might be making a lot of noise, but is it actually moving any air?
There’s a really simple trick you can use to check.
First, turn your exhaust fan on. Now, take a single square of toilet paper and hold it up flat against the fan's vent cover.
- If the fan grabs the paper and holds it there, your fan has decent suction. It's likely doing its job.
- If the paper just flutters and falls to the floor, you've got a problem. Your fan is either too weak for the size of your bathroom or it's so clogged with dust and lint that it can't breathe.
This little test gives you a clear answer in seconds. An underperforming fan is just recirculating damp air instead of removing it, which is basically a VIP invitation for mould to move in.
Dealing with a persistent mould problem can be a real headache, but you don't have to tackle it alone. For a professional, thorough solution that addresses the root cause, trust the team at That Cleaning Crew. Get in touch with us today for a free on-site quote and enjoy a clean, healthy bathroom again.