You can often remove mould from silicone with a targeted cleaner and a bit of elbow grease, but your success really depends on how deep the mould has dug its heels in. For those ugly surface stains, some DIY methods can work a treat. But… if the mould has burrowed inside the sealant, a full replacement is usually the only way you're going to get rid of it for good.
Why That Black Mould in Your Shower Keeps Coming Back
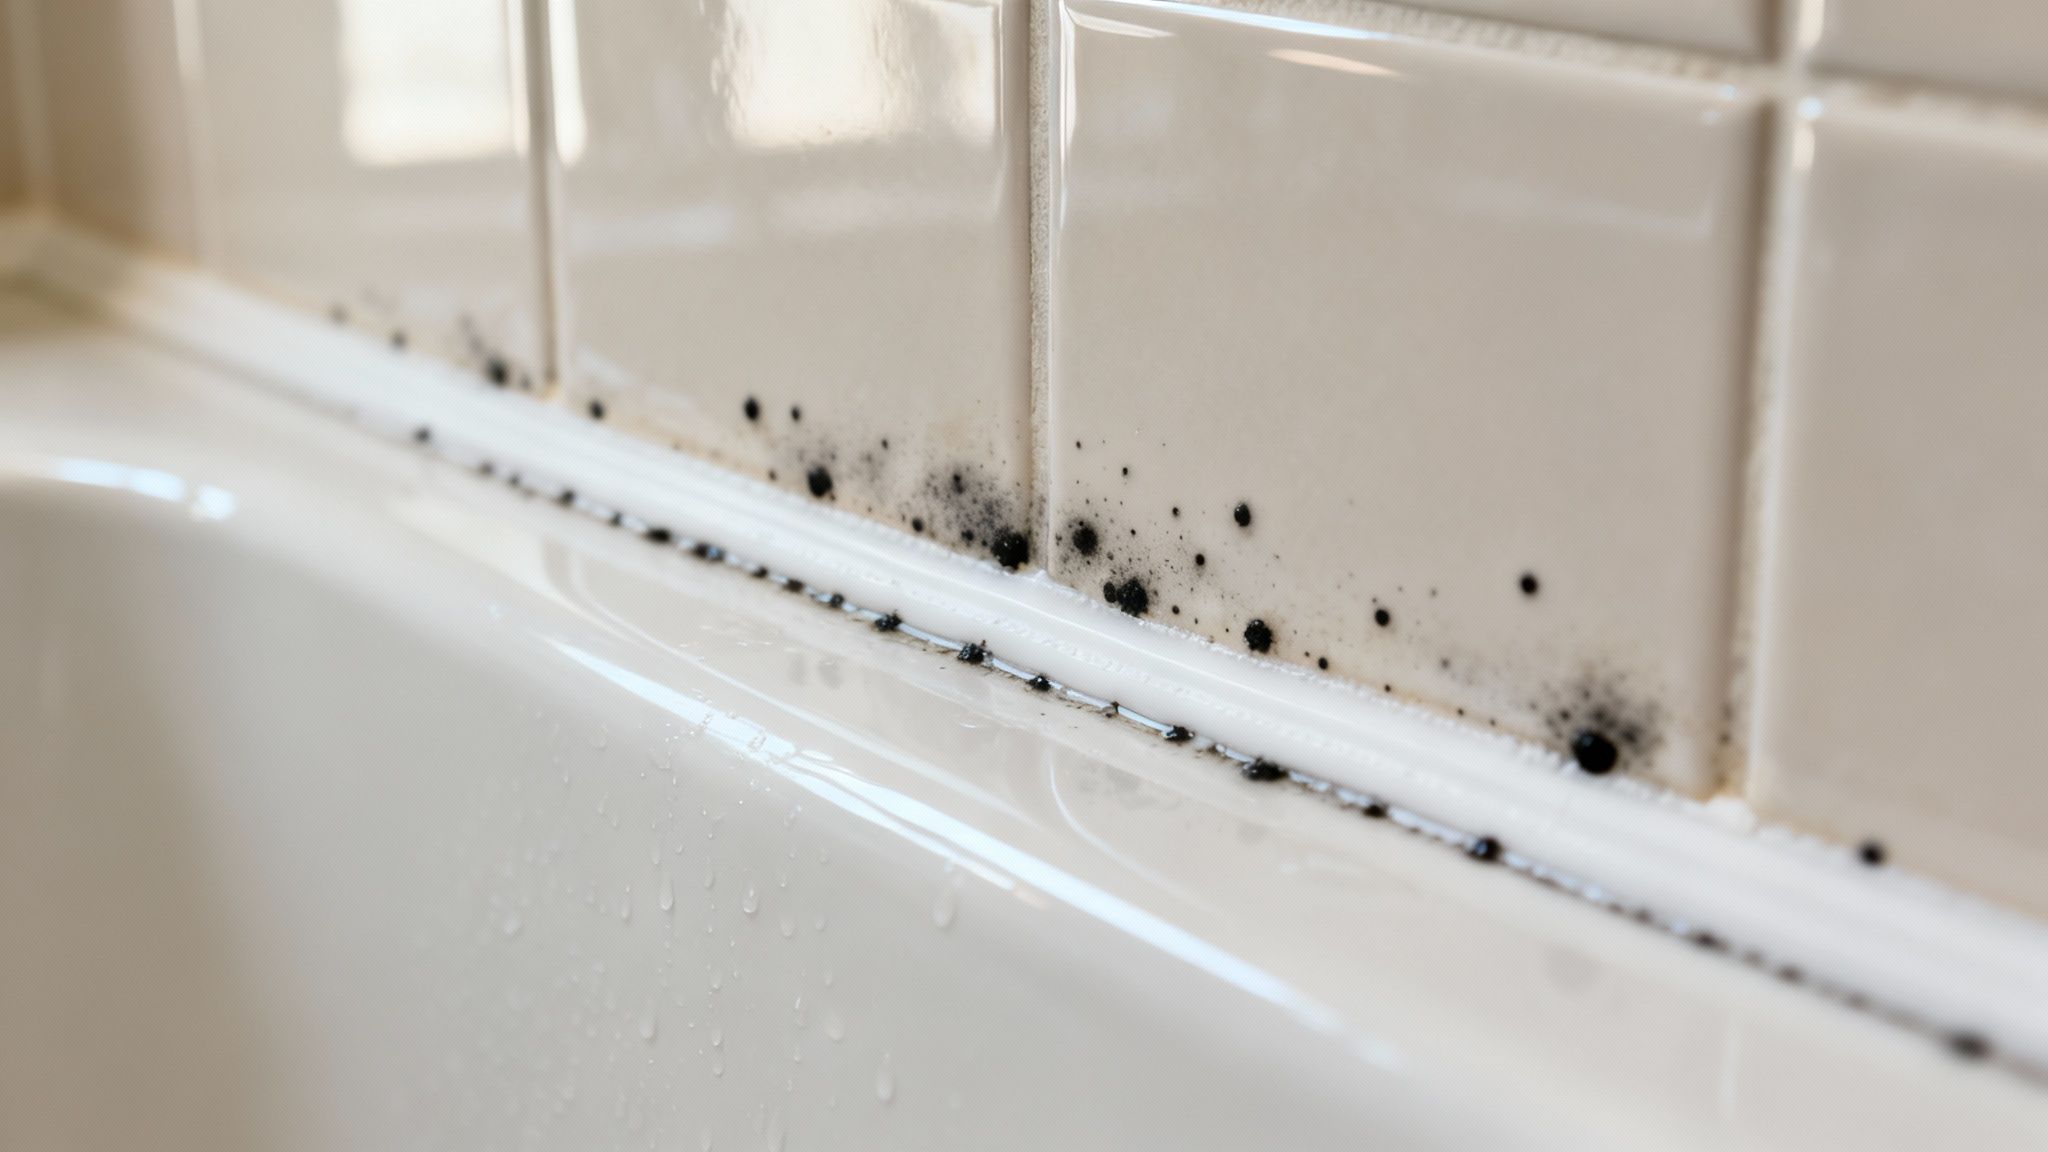
It’s beyond frustrating, isn’t it? You scrub the silicone in your shower until it’s sparkling, and then just a few weeks later, those ugly black spots start creeping back in.
It can feel like a battle you just can’t win.
This happens because your bathroom is pretty much the perfect five-star resort for mould. It absolutely loves the combination of warmth, darkness, and constant moisture that a steamy shower provides. And that soft, flexible silicone sealant? Well, that’s its favourite home base.
The Perfect Home for Mould
Unlike hard tiles or glass, silicone is a little bit porous. Think of it like a really dense sponge. So when mould spores land on it, they don’t just sit on the top… they can actually grow tiny roots that dig right down into the material itself.
So, when you wipe the surface, you’re only trimming the weeds. You’re not getting to the root of the problem, which is why it always seems to come back with a vengeance.
This isn’t just an Australian problem, it’s a global one—but our humid climate certainly doesn’t do us any favours. Research here in Australia shows that about 65% of homes see mould on their silicone within just two years. What’s more, for many of these homes, a bit of DIY cleaning isn’t enough, leading to expensive replacements down the track.
The real enemy isn’t the black stain you can see. It's the tiny network of mould that has set up camp deep inside the sealant, completely protected from your surface-level cleaning efforts.
To truly win this fight, you need a strategy that deals with both the visible mould and the conditions that let it grow in the first place. This means you’ve got to tackle two key areas:
- Effective Cleaning: Using methods that can get into the silicone to kill the mould at its source.
- Moisture Control: Cutting down on the dampness that invites mould in to begin with.
Poor airflow is mould’s best mate. Improving your bathroom's ventilation is a crucial, non-negotiable step in keeping your silicone clean long-term.
Gathering Your Mould Busting Toolkit
Right, before you dive in and start scrubbing, let's get your gear sorted. This isn't just about grabbing a bottle of cleaner; it’s about making sure you tackle the job safely. Trust me, the last thing you want is to be breathing in a big cloud of mould spores.
First thing's first. Ventilation. This is absolutely non-negotiable. Crack open a window or switch on the exhaust fan before you even think about touching a spray bottle. Getting some fresh air moving makes a world of difference.
Your Safety Essentials
This part is simple but incredibly important, so don't be tempted to skip it. You'll just need a few basic things from the hardware shop to protect yourself from both the mould and any cleaning chemicals you end up using.
- Gloves: A decent pair of rubber or disposable gloves is a must-have.
- Mask: A simple P2 mask will do the trick, stopping you from inhaling any airborne spores that get kicked up.
- Eye Protection: Safety glasses are great, but even an old pair of sunnies is better than nothing to protect your eyes from any accidental splashes.
Choosing Your Cleaning Weapon
Now for the fun part. You’ve got a couple of options here, from things you probably already have in your pantry to more heavy-duty commercial products.
If you're going the DIY route, knowing how to mix your ingredients is key. For example, getting the right baking soda to vinegar cleaning ratios can make a surprisingly effective paste for surface mould.
Lots of people like to start with natural options because they're cheap, easy to find, and less harsh. If that sounds like you, we’ve actually put together a whole guide on creating a powerful natural mould killer that works wonders on early-stage growth.
Think of this prep stage as setting yourself up for a win. Taking five minutes to grab your gear and ventilate the room can be the difference between a quick, easy job and a frustrating, fume-filled headache.
So, get your toolkit ready, get that window open, and you’ll be prepared to tackle that mould safely and effectively.
Step-by-Step Guide to Removing Mould from Silicone
Right, let's get to work on that mould. It's time to roll up your sleeves and go on the attack. We’ll walk through the different ways you can handle it, starting with some gentle stuff you probably have in your pantry, then moving up to the heavy hitters.
First up is the natural approach. Things like vinegar and bicarb soda aren't just for cooking… they can be surprisingly effective against fresh, surface-level mould. You just need to know their strengths… and their limits.
The At-Home, Natural Approach
If you've just spotted a few light specks of mould that haven't had time to settle in, a simple bicarb paste can work wonders. Just mix bicarb soda with a splash of water until you've got a thick, toothpaste-like consistency.
Slather this paste right onto the mouldy silicone and give it a good 10-15 minutes to sit. Then grab an old toothbrush and give the area a firm scrub. The gentle abrasive quality of the bicarb helps lift the stains right off the surface without scratching up your sealant. Easy.
Need a bit more punch? White vinegar is your next go-to. Its acidity is fantastic for killing off mould spores and stopping them in their tracks.
- Application: Pour some undiluted white vinegar straight into a spray bottle.
- Dwell Time: Give the mouldy silicone a really generous spray and let it sit for at least an hour. Don't rush this part. The vinegar needs time to work its magic on the spores.
- Scrub and Rinse: After an hour has passed, scrub the area again with your toothbrush and then rinse it all off thoroughly with water.
This one-two punch of a bicarb scrub followed by a vinegar spray is often all you need to knock out minor mould issues before they turn into a bigger headache.
This flowchart helps map out the decision process when you're choosing your mould-fighting toolkit.
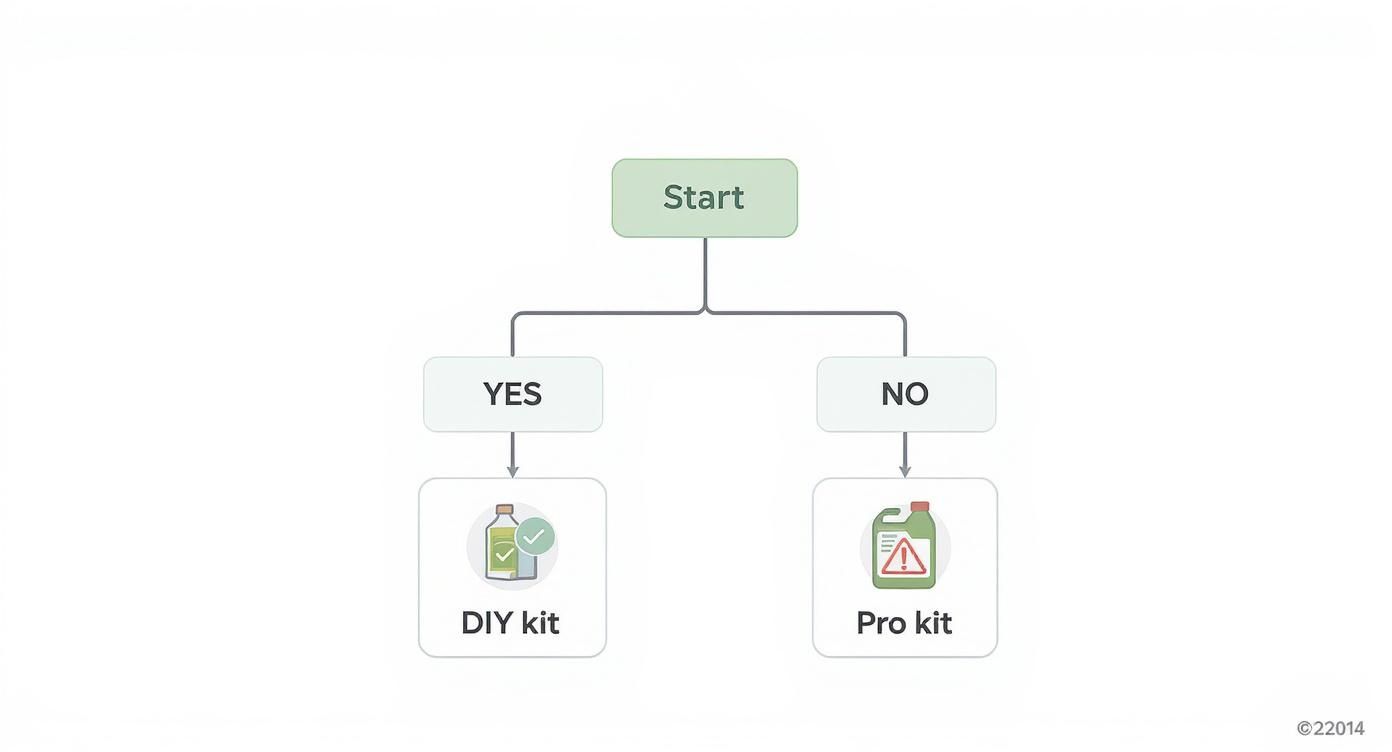
As you can see, the big question is whether the mould is just sitting on the surface or if it has managed to dig deep into the sealant itself.
Choosing Your DIY Mould Removal Method
Still not sure which way to go? Here’s a quick comparison of the common DIY methods to help you decide which is right for your mould situation.
| Method | Best For | How to Use | Pros | Cons |
|---|---|---|---|---|
| Bicarb Soda Paste | Light, fresh surface mould and minor stains. | Mix with water to a paste, apply for 10-15 mins, scrub with a brush, and rinse. | Non-toxic, cheap, and gentle on surfaces. | May not kill deeper mould spores or remove set-in stains. |
| White Vinegar Spray | Killing surface mould spores. | Spray undiluted vinegar on the area, let it sit for at least an hour, scrub, and rinse. | Natural disinfectant, effective at killing spores, inexpensive. | Strong smell, may not bleach out dark stains. |
| Commercial Cleaner | Stubborn, deep-set stains and persistent mould. | Follow the product's instructions carefully. Usually spray, dwell, scrub, and rinse. | Powerful and effective, designed to kill mould and bleach stains. | Contains harsh chemicals, requires good ventilation and PPE. |
| Cotton Ball Soak | Extremely stubborn, deeply embedded stains. | Soak cotton balls in commercial cleaner, press onto the sealant, and leave overnight. | Provides prolonged contact for maximum stain-lifting power. | Requires strong chemicals and careful handling. |
Ultimately, the best method really depends on how stubborn your mould is. Start with the gentlest option and only move on to stronger chemicals if you need to.
When You Need Something Stronger
Look, sometimes the natural methods just don't cut it. That's when you reach for a product specifically made to remove mould from silicone. You can find these at any hardware store, and they are designed to kill mould and bleach out those stubborn black stains it leaves behind.
These products are generally much more powerful. And while the application is similar to using vinegar, paying attention to the instructions is absolutely critical.
Always follow the manufacturer's directions on the bottle. This isn't just about getting the best results; it's about using the product safely, especially regarding ventilation and how long you should leave it on.
Typically, you'll spray the product onto the dry silicone, let it sit for the recommended time (which can be anywhere from 15 minutes to several hours), and then scrub and rinse it all away.
For those really stubborn, deep-set stains that seem to laugh at a simple spray and scrub, try this little trick. Soak some cotton balls or a strip of paper towel in your mould remover and press it firmly against the silicone sealant. This keeps the cleaning agent in constant contact with the mould, giving it more time to soak in and break down those ugly stains. Leave it overnight, and you might just be surprised by how much better it looks in the morning.
When to Stop Scrubbing and Start Replacing
Sometimes, you’ve just got to know when to call it a day. You can scrub until your arms ache and try every mould cleaner on the shelf, but some silicone is just… beyond saving. It's a tough pill to swallow, but if that mould has been there for a while, it’s probably not just sitting on the surface anymore.
It has dug in deep, staining the sealant from the inside out, and has possibly even started creeping in behind it. When you reach that point, cleaning is really just a temporary fix. The only real, long-term solution is to cut out the old stuff and start fresh. It's not as scary as it sounds, I promise.
Signs It's Time for a Do-Over
So, how do you know if you've hit the point of no return? There are a few dead giveaways that all your scrubbing efforts will be for nothing.
- Permanent Staining: You’ve cleaned the area thoroughly, the surface feels smooth, but those ugly grey or black stains are still there. This is a classic sign the mould has permanently discoloured the silicone itself.
- The Sealant is Damaged: The silicone is peeling away from the wall or tiles, is cracked, or feels oddly soft and mushy. A damaged seal isn’t just ugly; it’s letting water get in behind it, which is basically an open invitation for more mould.
- Mould Behind the Silicone: You might see dark shadows behind a clear or translucent bead of sealant. This is a sure sign the problem is deeper than you can reach with a brush.
If you're seeing any of these signs, it’s time to stop fighting a losing battle and replace the sealant. It’s a small weekend project that delivers a massive, satisfying result… a perfectly clean, mould-free seal.
Your Simple Guide to Replacing Silicone
Okay, let's break this down into manageable steps. You don't need to be a professional tradie to get this done right. First, you'll need a few basic tools: a utility knife, a sealant removal tool (they’re cheap and absolutely worth it!), your new tube of mould-resistant silicone, and a caulking gun.
The first step is getting the old stuff out. Carefully run your utility knife along the top and bottom edges of the old sealant. Try to get the blade right in there to break the seal, then use your removal tool or a pair of pliers to pull the old strip out. Be patient with this part; getting it all out now saves you headaches later.
Once it’s out, you need to clean that gap like your life depends on it. Scrape away any stubborn bits, then give it a good clean with methylated spirits to kill any lingering mould spores. This step is critical… if you apply new sealant over a dirty surface, the mould will just come right back.
Applying a fresh bead of silicone is all about slow, steady pressure. Go at an even pace to get a consistent line. And here's a little trick I've used for years: have a cup of soapy water and an old cloth handy. Dipping your finger in the soapy water to smooth the bead gives you a perfect, professional-looking finish every time.
Once you’re done, let it cure properly according to the instructions on the tube, which is usually at least 24 hours. Don't be tempted to use the shower early! Giving it that full time to cure ensures you get a completely waterproof, durable seal that will last.
If the mould problem seems widespread or you suspect it's coming from inside the walls, it might be time to investigate further. Our guide to mould removal on the Central Coast can offer some extra insights into tackling bigger issues.
How to Keep Your Silicone Mould Free for Good
You’ve done the hard work, and your silicone is looking brand new again. Fantastic! So, how do we keep it that way?
Winning the war against mould isn’t about one big clean. It’s about creating simple, daily habits that stop it from ever getting a foothold in the first place.
Make Your Bathroom a No-Go Zone for Mould
Mould thrives on moisture. It’s that simple. If you can control the dampness, you control the mould. This is your long-term game plan.
Think of it like this… a steamy bathroom is mould’s favourite restaurant. Your job is to close the kitchen for good.
- Improve Airflow: This is the big one. Always run your exhaust fan during a shower and for a good 20-30 minutes afterwards. If you don’t have a fan, crack a window open every single time. Consistent airflow is your number one defence.
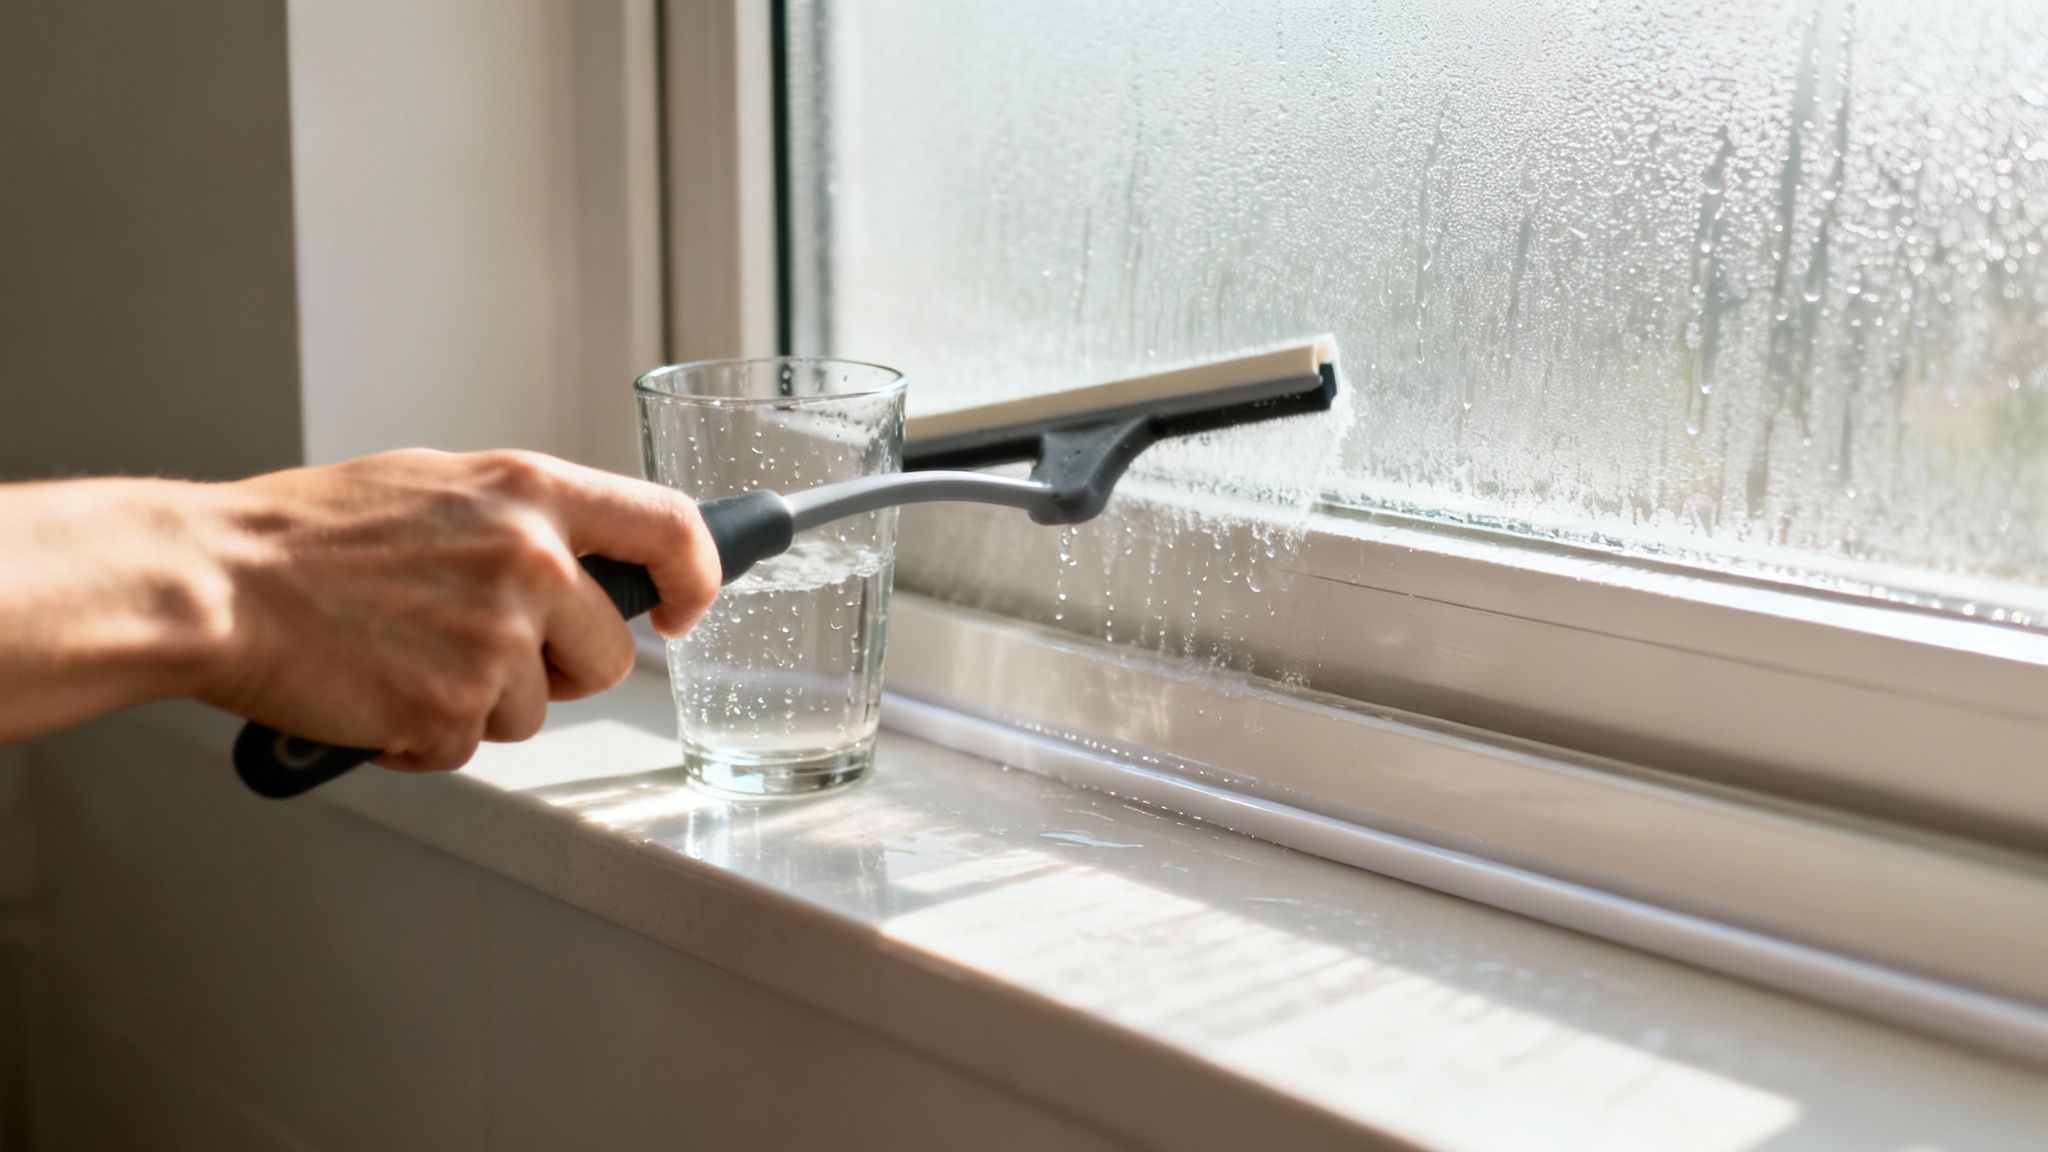
- Wipe It Down: After a shower, grab a squeegee or a microfibre cloth and give the wet surfaces a quick wipe. Pay special attention to the silicone bead itself. This tiny two-minute habit removes the standing water that mould needs to survive.
It might sound like a bit of a chore, but these little actions make an enormous difference.
Prevention is all about changing the environment. If you make your bathroom an inhospitable place for mould, it will simply give up and go somewhere else.
Beyond just cleaning, understanding the bigger picture of mold contamination health risks and prevention tips is key to making sure your home remains a safe, mould-free space for your family long-term.
The Long Game Strategy
Building good habits is essential, but a couple of other things can set you up for future success. This is all about preventing the need to remove mould from silicone all over again.
Fixing a tiny, dripping leak might seem like a job for another day, but it’s creating a constant source of moisture. Taking care of small leaks quickly cuts off mould’s lifeline.
It’s a stark reality that prevention is often overlooked until it's too late. A significant report from the Western Australian Department of Health found that homes with poor ventilation were 3.5 times more likely to experience severe mould growth on silicone. This data really highlights just how critical proactive moisture control is in Australian homes.
If you’re replacing sealant or starting a new project, make sure you choose the right product from the get-go.
- Look for Mould-Resistant Silicone: Not all silicones are created equal. Spend the extra few dollars on a high-quality sealant that contains a biocide—an active ingredient specifically designed to stop mould growth from within.
- Check the Cure Time: Always let new silicone cure for the full recommended time, usually at least 24-48 hours, before you expose it to water. A proper cure creates a stronger, more resilient barrier.
By combining these daily habits with smart product choices, you're creating a robust defence system. You’re not just cleaning mould; you’re building an environment where it simply can't come back.
Common Questions About Silicone Mould Removal
You're not alone in this fight against mould. Honestly, it's one of those annoying home maintenance jobs that seems to pop up for everyone. We get a lot of questions about this tricky topic, so we've gathered the most common ones here with simple, direct answers to help you out.
Can I Just Use Bleach to Kill Mould on Silicone?
It’s a common go-to, isn't it? Bleach feels like the ultimate sanitiser. But we generally advise against using it straight on silicone sealant.
While bleach might whiten the surface stains and give you the illusion that the mould is gone, it often doesn’t kill the mould ‘roots’ that have grown deep into the porous silicone. Think of it like painting over a rust spot… the problem is still festering underneath. Over time, bleach can also damage the sealant itself, making it brittle and less effective at keeping water out.
Honestly, you're better off using products specifically designed for mould that are safer for you and won't wreck your silicone.
How Do I Know if the Mould Is Just on the Surface?
This is a great question, and there's a pretty simple way to find out. Start by testing a small, hidden area with a dedicated mould remover.
Apply the cleaner, let it sit for the recommended time, and then give it a solid scrub before rinsing it off. If the black stains vanish completely, you can breathe a sigh of relief… you're likely just dealing with surface mould.
But if a faint stain remains, even after a proper clean, that's a tell-tale sign the mould has burrowed deep into the silicone. At that point, no amount of surface cleaning is going to fix it. Replacement is your best bet for a long-term solution.
A lingering stain after a thorough clean is the clearest sign that the mould has won the battle and has permanently discoloured the silicone from within.
I Replaced My Silicone but the Mould Came Back. Why?
This one is incredibly frustrating, and it almost always points to an underlying moisture problem. Mould has one non-negotiable need: moisture. If it has water, it will thrive.
Once you’ve gone to the trouble of replacing the silicone, your focus has to shift entirely to prevention. Are you running the exhaust fan during every shower and for at least 20 minutes afterwards? If you don't have a fan, is a window being opened every single time to let the steam escape?
Simple habits, like using a squeegee to wipe down the shower walls and quickly drying the silicone bead, make a world of difference. Consistent moisture control is the only way to stop it from coming back for good.
Is Mould on Silicone Sealant Dangerous?
While a few small spots of mould on your silicone are more of an eyesore than anything else, extensive growth can become a health concern by releasing spores into the air.
For some people, especially those with allergies, asthma, or compromised immune systems, these spores can trigger respiratory issues, skin irritation, or allergic reactions. It’s always best to deal with mould promptly—not just for the look of your bathroom, but for the health of your home's air quality too.
When DIY methods aren't enough or you're facing a stubborn mould problem in a commercial setting, getting professional help is the safest and most effective solution. The team at That Cleaning Crew has the expertise and equipment to handle mould remediation properly, ensuring it’s gone for good. Get in touch for a free on-site quote today.