Getting rid of bathroom mould is about more than just a quick scrub. It really is. To truly win the battle, you need to understand why it showed up in the first place. The secret is tackling the source of the moisture, using an effective cleaning solution like vinegar, and making sure everything is bone dry afterwards. Simple as that.
Confronting That Unwanted Bathroom Guest
Okay, let's talk about it. That creeping, dark stuff in the corners of the shower or along the silicone sealant. It’s more than just an eyesore, isn't it?
Seeing it pop up can feel a bit defeating. You clean and you clean, and it just decides to show up anyway, completely uninvited. But you’re definitely not alone in this fight… it's an incredibly common problem in homes everywhere.
Getting to Know Your Opponent
Before we jump into how to clean it, it really helps to understand what you're actually dealing with. Mould is a type of fungus, and it absolutely adores our bathrooms for one very simple reason.
It’s the perfect home. If you think about it from the mould’s perspective, your bathroom is a five-star resort offering:
- Constant moisture from all those lovely steamy showers and baths.
- Plenty of warmth, which helps it multiply even faster.
- A buffet of food in the form of soap scum, body oils, and skin cells.
The usual suspects you’ll find making themselves at home are types like Penicillium or Cladosporium. They’re the ones creating those familiar black, green, or greyish spots that cling stubbornly to your grout and silicone.
The thing is, ignoring these spots isn’t the best idea. This isn't about scare tactics; it’s about being informed. Small spots can spread, and that’s when a little weekend cleaning job can turn into a much, much bigger headache.
Why You Can't Just Ignore It
This is more than just a cosmetic issue. For some people, mould can trigger health concerns, which is why taking action quickly is so important.
If you feel like you're constantly battling mould, you're in good company. Research suggests that around half of Australian homes have reported issues with mould, mildew, or fungi. It's a huge problem, often because our varied climate zones create the perfect indoor conditions for mould genera like Aspergillus and Penicillium to thrive. You can read more about these findings on indoor mould prevalence.
This guide is your game plan. We'll break down the difference between a tiny spot you can handle yourself and a more serious problem that might need a professional's touch. For a deeper look into the health side of things, you can also explore our article covering the hidden dangers of mould.
By the end of this, you’ll have the confidence to tackle that unwanted bathroom guest head-on.
Assembling Your Mould-Fighting Toolkit
Before you charge into battle, you need the right gear. Going in unprepared is a rookie mistake, and when you’re dealing with mould, you want to get this done right the first time without putting your health on the line.
And your health is absolutely non-negotiable here. Stirring up mould releases spores into the air, and breathing that stuff in can cause some real dramas for your respiratory system. It’s like a chef preparing food… you wouldn't start cooking without washing your hands first. Same principle.
Your Personal Protective Equipment (PPE)
First things first, let’s gear up. This isn't about being overly dramatic; it’s about being smart and safe.
Here's the essential safety gear you'll need:
- A P2 Mask: This is a must-have. A simple dust mask just won't cut it, as it doesn’t filter out the tiny, invisible mould spores you're about to stir up.
- Gloves: A good pair of rubber or nitrile gloves is essential to protect your hands from direct contact with both the mould and the cleaning solutions you're using.
- Safety Glasses: You’d be surprised how easily cleaning solutions can splash. A pair of goggles or safety glasses will keep any unexpected spray out of your eyes.
This infographic lays out all the essential tools you'll need to have on hand before you even think about starting.
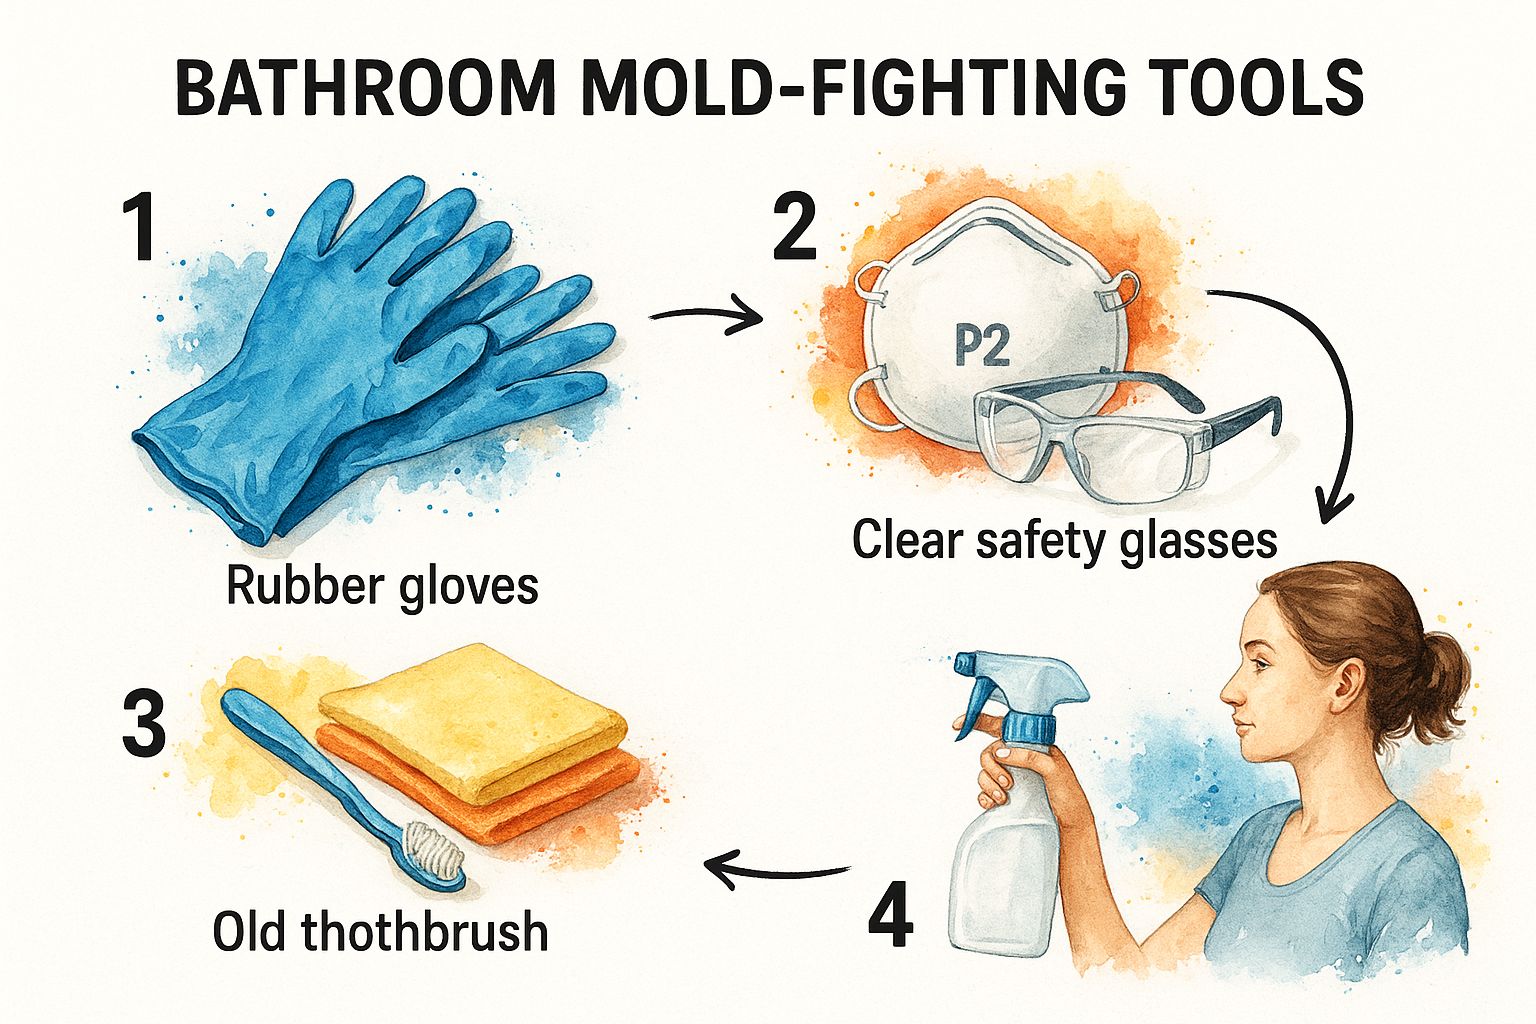
Seeing it all laid out like this really drives home how simple but important each item is for doing the job safely and effectively.
Choosing Your Cleaning Weapon
Now for the solutions. Walk down the cleaning aisle at the supermarket and you'll see a dozen different products promising to kill mould. And while many commercial mould killers are effective, they often contain some pretty harsh chemicals.
You might be surprised to learn that one of the most powerful tools is probably already in your pantry. Plain old white vinegar.
Unlike bleach, which often just whitens the surface of mould on porous materials like grout without killing the roots underneath, vinegar actually gets in deep and kills the mould at its source. For most jobs, a simple spray bottle filled with a 50/50 mix of white vinegar and water is all you need.
If you’re staring down some tougher, more stubborn stains, you might need a bit more scrubbing power.
A paste made from bi-carb soda and a little water can act as a gentle but effective abrasive. It's fantastic for lifting those stubborn spots without scratching up your tiles or bathtub.
To help you decide what's right for your situation, here's a quick comparison of the most common options.
Your Mould Cleaning Toolkit Comparison
| Cleaning Solution | Best For | Pros | Cons / Cautions |
|---|---|---|---|
| White Vinegar (50/50 with water) | Porous surfaces like grout, silicone, and painted walls. Kills mould at the root. | Natural, non-toxic, highly effective at killing the mould itself, not just bleaching it. | Strong smell (dissipates quickly). May not remove deep-set stains on its own. |
| Bi-Carb Soda Paste | Stubborn surface stains on tiles, bathtubs, and sinks. Used as a gentle scrub. | Natural, non-abrasive, great for lifting stains without scratching surfaces. | Requires a bit of elbow grease. Not a primary mould killer but a great cleaning aid. |
| Commercial Mould Killer | Heavy-duty mould infestations on non-porous surfaces like glass or tiles. | Very effective at killing mould and removing stains quickly. | Often contains harsh chemicals (like bleach), strong fumes, and requires good ventilation. Can damage some surfaces. |
| Bleach (diluted) | Removing mould stains from hard, non-porous surfaces. | Excellent at whitening and removing the appearance of mould. | Doesn't kill mould roots on porous surfaces. Fumes are toxic. Can damage grout and silicone over time. |
Ultimately, the best choice depends on the surface you're cleaning and how severe the mould problem is. For most day-to-day bathroom mould, I always start with vinegar and bi-carb soda. It just works.
Finally, you’ll need some basic tools. A stiff-bristled scrubbing brush is a must for getting into tile grout. And honestly? An old toothbrush is your secret weapon for those tight corners around taps where mould loves to hide.
To finish everything off, grab a couple of microfibre cloths—one for cleaning up the residue and one for drying the area completely when you’re done. Remember, moisture is mould's best friend. Getting the area bone dry is the final knockout punch.
Your Action Plan for a Mould-Free Bathroom
Alright, it’s go-time. This is where we roll up our sleeves and reclaim your bathroom from mould. I’ll walk you through the entire process, just like I was there with you, making sure you feel confident every step of the way.
First up, preparation is everything. You can’t just charge in, spray bottle blazing. We need to create a safe work zone first.
The most important first move? Ventilation. Throw open any windows in the bathroom. If you don't have one, stick a fan in the doorway and point it out of the room. This helps pull any airborne mould spores and cleaning fumes away from you. Seriously… don't skip this.
Tackling Different Bathroom Surfaces
Mould doesn’t treat all surfaces the same, so our approach has to be a little different for each one. Think of it like cooking… you wouldn't use the same heat and time for a steak as you would for a delicate piece of fish. How you treat mould on tiles is different from how you'd handle it on silicone.
Let’s break down the game plan for the most common culprits.
For Tiles and Grout
This is usually ground zero for mould. Grout is porous, which means it’s like a sponge, giving mould a perfect place to put down roots. This is where your spray bottle of 50/50 white vinegar and water comes into play.
- Saturate the Area: Spray the mouldy grout lines and tiles generously. Don't be shy here… you want the vinegar solution to really soak in and get to work.
- Let It Sit: Now, patience. Let the solution sit for at least an hour. This gives the vinegar enough time to penetrate the grout and kill the mould at its roots, not just on the surface.
- Time to Scrub: Grab your stiff-bristled brush (an old toothbrush is perfect for tricky spots) and start scrubbing. You’ll see the mould start to lift away. If you hit a really stubborn spot, make a paste with bi-carb soda and a bit of water, apply it, and scrub again.
For Silicone Sealant
You know that black stuff that creeps along the edges of your shower or bathtub? That's mould that has embedded itself deep into the silicone. This can be a bit trickier because once it’s inside the silicone, it's almost impossible to scrub out completely.
For any surface mould, the vinegar spray and scrub method can work well. But if the stains are deep within the sealant itself, replacement is often the only 100% effective solution.
It might sound like a hassle, but ripping out the old, mouldy silicone and applying a fresh bead is a guaranteed way to get a clean start. It’s a bit of a project, but it’s often better than fighting a losing battle.
For Painted Walls and Ceilings
Mould on painted surfaces, especially on the ceiling directly above the shower, is a classic sign of poor ventilation. All that steam rises and settles there, creating the perfect damp environment.
Your approach here needs to be a little gentler to avoid damaging the paint.
- Spray and Wait: Lightly mist the affected area with your vinegar solution. Don't drench it to the point where it’s dripping everywhere.
- Wipe, Don’t Scrub: After about an hour, gently wipe the area with a damp microfibre cloth. Avoid aggressive scrubbing, which can lift the paint right off.
- Repeat if Needed: You might need to do this a couple of times for more persistent spots.
The Crucial Final Steps
Once you’ve scrubbed the mould away, you're not quite done. Rinsing and drying the area properly is just as important as the cleaning itself. It’s the final knockout punch.
Rinse all the cleaned surfaces thoroughly with clean water to remove any leftover vinegar and loosened mould residue. Then, take a clean, dry microfibre cloth and wipe everything down until it is completely dry. For an extra measure of confidence, point your fan at the cleaned area for another 30 minutes.
This whole process takes the guesswork out of removing mould from your bathroom and puts you back in control.
You’ve done the hard work, and your bathroom is sparkling. Amazing! Now… how do you keep it that way?
Getting rid of mould is one thing, but making sure it never comes back is the real victory. It all comes down to creating a bathroom environment that mould absolutely hates. Think of it like turning your bathroom into a desert for mould—a place where it just can't survive.
This boils down to three key areas: ventilation, moisture control, and regular cleaning. It’s a simple formula, but consistency is everything.
Master Your Airflow and Moisture
The number one enemy of mould is dry, circulating air. A damp, stagnant bathroom is basically a welcome party for mould, and we need to shut that party down for good.
Your exhaust fan is your best friend here. Don't just flick it on while you're in the shower; let it run for a good 20-30 minutes afterwards to pull all that lingering steam out. If you don't have a fan, cracking a window open works wonders, too.
Next, get into the habit of managing any water left behind.
- Embrace the squeegee: Keep a cheap squeegee in the shower. A quick 30-second wipe-down of the glass and tiles after every use stops water from just sitting there.
- Wipe down walls: Use an old towel to quickly dry any really wet spots on the walls or floor.
- Hang towels properly: Never leave damp towels bunched up on the floor. Hang them up to dry completely, preferably outside the bathroom if it’s a small space.
These little habits feel small, but they add up to a massive difference. You're basically removing the "standing water" that mould needs to set up camp.
Build a Long-Term Defence Strategy
Beyond your daily habits, a few bigger-picture strategies can make your bathroom practically mould-proof. It’s about making smart choices that work for you in the background.
First, check for any slow leaks. That tiny, persistent drip under the sink creates a constant source of moisture that mould adores. Fixing these is a non-negotiable step in preventing bathroom mould for good.
Even extreme weather can play a huge part. Following the severe flooding in Western Australia’s Kimberley region in early 2023, many homes developed serious indoor mould problems. It just shows how quickly things can escalate when water gets out of control. You can learn more about how flooding impacts indoor mould.
When it comes time to renovate, think ahead.
- Choose mould-resistant paint: Look for bathroom-specific paints that contain mould inhibitors. This adds an extra layer of protection right onto your walls.
- Consider your grout: Opting for an epoxy grout instead of a traditional cement-based one can be a game-changer, as it's non-porous and far more resistant to mould.
- Bring in some nature: Surprisingly, certain indoor plants like Peace Lilies are great at helping to regulate humidity levels. Plus, they look fantastic.
By combining these simple, everyday habits with some smarter long-term choices, you’re not just cleaning mould; you’re changing the entire environment. You're building a bathroom that actively resists it, giving you peace of mind.
Knowing When to Call in a Professional
Look, sometimes a DIY approach just isn't the right answer. And that's perfectly okay. Knowing when to put down the scrubbing brush and pick up the phone is a crucial part of safely removing mould. It's not about admitting defeat… it's about making the smartest, safest choice for your home.
But how do you know when you’re out of your depth? It’s a common question. You've followed all the steps, used the vinegar, and scrubbed until your arms ache, but the mould keeps coming back.
The Tipping Point
There are a few clear signs that the problem has moved beyond a simple weekend clean-up. If you notice any of these, it’s time to seriously think about calling in a professional.
- The spread is significant. If the mould covers an area larger than one square metre, that’s generally considered a large-scale problem. Think of it like a small spot fire versus a bushfire… once it gets to a certain size, you need specialised equipment to handle it safely.
- It’s a recurring nightmare. You clean it thoroughly, but it comes back in the same spot again and again. This almost always means the root of the problem is deeper than the surface, like a hidden leak that a simple scrub can't fix.
- You suspect it's hiding. If you notice a persistent musty smell but can't see much mould, it could be lurking behind walls or under the floorboards. That's a definite sign you need an expert with the right tools to find the source.
This is especially important if someone in your home has allergies, asthma, or a compromised immune system. Their health is the top priority, and airborne spores from a large infestation pose a significant risk that just isn't worth taking.
Making that call can feel a bit daunting, especially when you think about the cost. In Australia, the price for professional removal can vary a lot, but for a small bathroom, you might be looking at around $500 to $2,000. You can discover more insights about what impacts professional mould removal costs to get a clearer picture.
A professional service doesn’t just clean what you can see; they find and fix the source. That’s the real key. Our team specialises in professional mould remediation services, ensuring the problem is handled correctly from start to finish.
Your Bathroom Mould Questions Answered
Alright, you've got the game plan, but a few questions are probably still floating around. That’s completely normal. When you're staring down a patch of bathroom mould, a few "what ifs" are bound to pop up.
Let's clear the air and tackle the common things people wonder about.
Should I Use Bleach to Kill Mould?
This is the big one, isn't it? For years, we've been told that bleach is the ultimate cleaner. But when it comes to mould, the story is a bit more complicated.
Bleach is fantastic at whitening stains, which makes it look like the mould has vanished. On non-porous surfaces like tiles, it can do a decent job. But on porous materials like grout? Bleach often just zaps the surface mould, leaving the roots untouched underneath to grow right back.
Think of it like pulling the top off a weed. Bleach just handles what you can see, but vinegar gets down and deals with the roots. That’s why vinegar is often the better long-term solution. Plus, the fumes from bleach in a small bathroom can be seriously potent.
Is It Mould or Just Mildew?
It's easy to mix these two up because they're both types of fungi that love damp spots. The easiest way to tell them apart is by how they look and feel.
Mildew is typically:
- A surface dweller: It usually looks like a greyish or white powdery patch sitting right on top of a surface.
- Flat and fuzzy: It doesn't dig deep into whatever it's growing on.
Mould, on the other hand, is usually a bit more sinister. It’s often black or green, and can have a slimy or fuzzy texture. The key difference is that mould penetrates deeper, sending roots down into grout and silicone. So, while you treat them similarly, mould requires a much more thorough approach.
Can I Clean Mould Off My Shower Curtain?
Absolutely! If you’ve got a plastic shower curtain, you can usually take it down and give it a good scrub in the bathtub with your vinegar solution. For fabric curtains, check the care label. Most of them can be tossed in the washing machine with a bit of vinegar and your regular detergent.
But let's be honest. If the mould stains are really set in, sometimes the best and healthiest choice is just to replace it. They aren’t too expensive, and it gives your bathroom a completely fresh start.
Battling stubborn mould can feel like a never-ending job. If you'd rather leave it to the experts, That Cleaning Crew provides professional mould remediation services to get your bathroom back to its best. Get your free on-site quote today!